Attic rain—when moisture collects underneath your home’s roof and seeps down into your home—can cause water damage and impact the value of your property. But learning more about why attic rain occurs and how to recognize the early signs can help you take steps to prevent it or deal with it quickly if it happens.
The Guns N Hoses team has spent years working to put safe and reliable roofs over the heads of Calgarians—so we know all about what causes attic rain and what you can do about it. In this article, we'll guide you through everything you need to know.
Table of Contents
- What is Attic Rain?
- Common Causes of Attic Rain
- Climate Conditions & Attic Rain
- Symptoms of Attic Rain
- Detecting and Diagnosing Issues
- Long-Term Consequences of Untreated Attic Rain
- Effective Solutions for Addressing Attic Rain
- FAQs about Preventing & Resolving Attic Rain
What is Attic Rain?
Attic rain occurs when warm, moist air inside your home rises and condenses on the colder surfaces of your attic. Over time, this condensation can accumulate and start to "rain" back down, causing issues that range from mildew growth to structural damage.
Common Causes of Attic Rain
- Inadequate Insulation: Poor or outdated insulation can make it easier for warm air to escape into the attic.
- Poor Ventilation: An inadequately ventilated attic can trap moisture, exacerbating the problem.
- Structural Problems: Gaps or cracks in the upper levels of your home can allow warm air to infiltrate these spaces, creating a ripe environment for attic rain.
Climate Conditions & Attic Rain
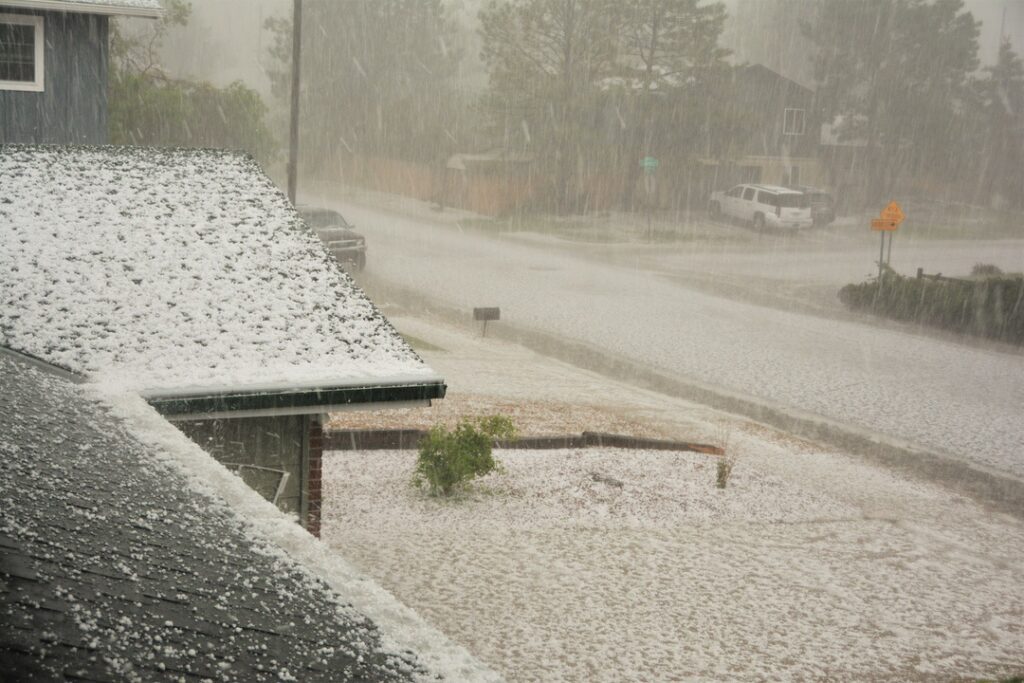
Living in Calgary, AB, means dealing with some harsh weather conditions that can make attic rain more likely:
- Extreme Temperature Fluctuations: Rapid changes in temperature can lead to condensation as the warm air inside clashes with the cold attic air.
- Heavy Snowfall: Snow can block ventilation systems, making it difficult to circulate air properly.
- High Humidity: Humid conditions mean there's more moisture in the air, which can collect more easily in attic areas if it gets in and can’t be properly circulated.
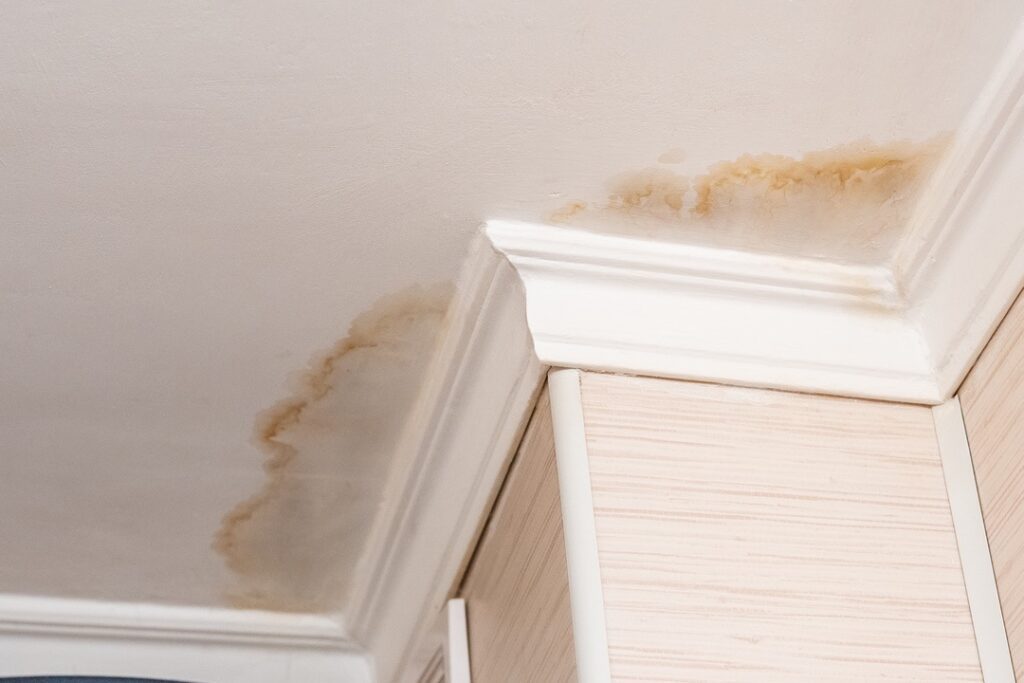
Symptoms of Attic Rain
Wondering if your home has an attic rain problem? Here's what to look out for:
- Water Stains: Yellow or brown water stains on your attic ceiling or walls.
- Damp Insulation: Insulation that feels wet or soggy to the touch.
- Mildew Smell: An unpleasant, musty odor emanating from the attic.
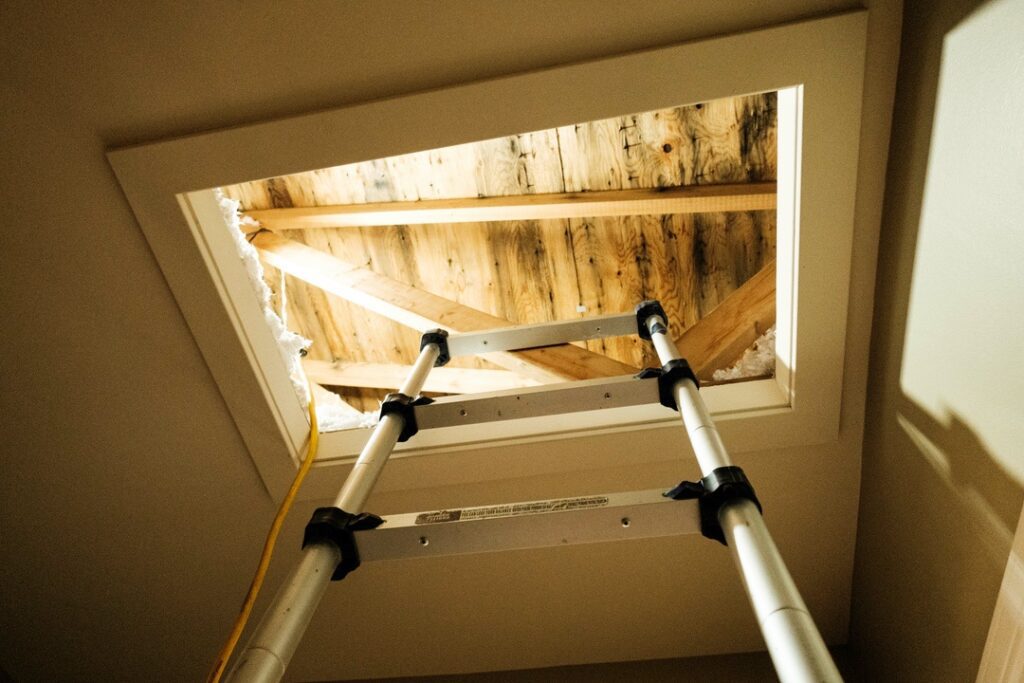
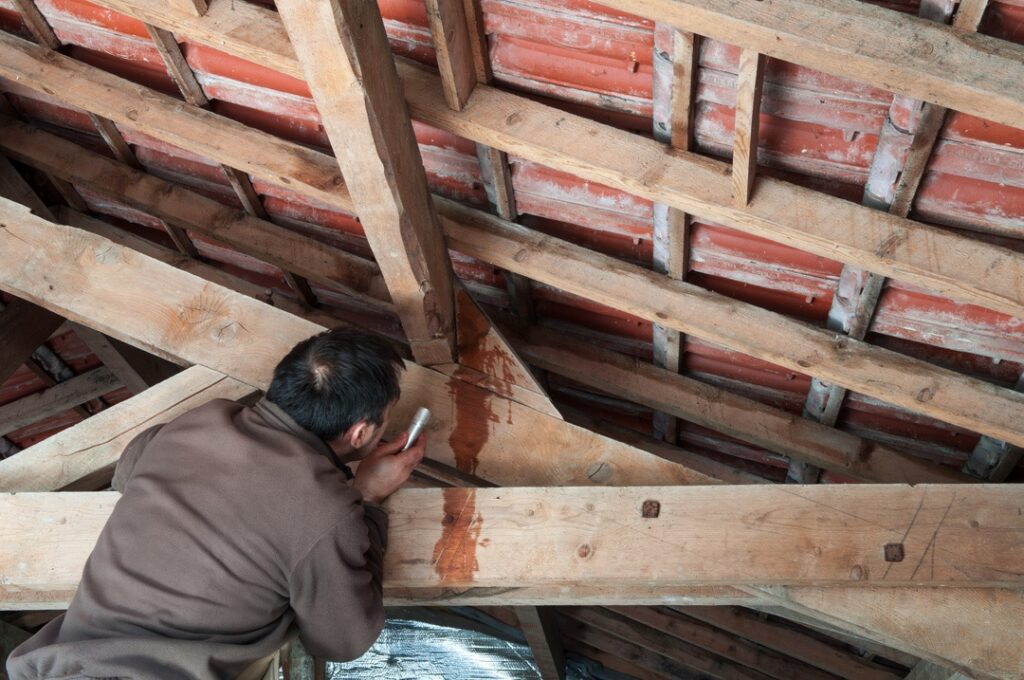
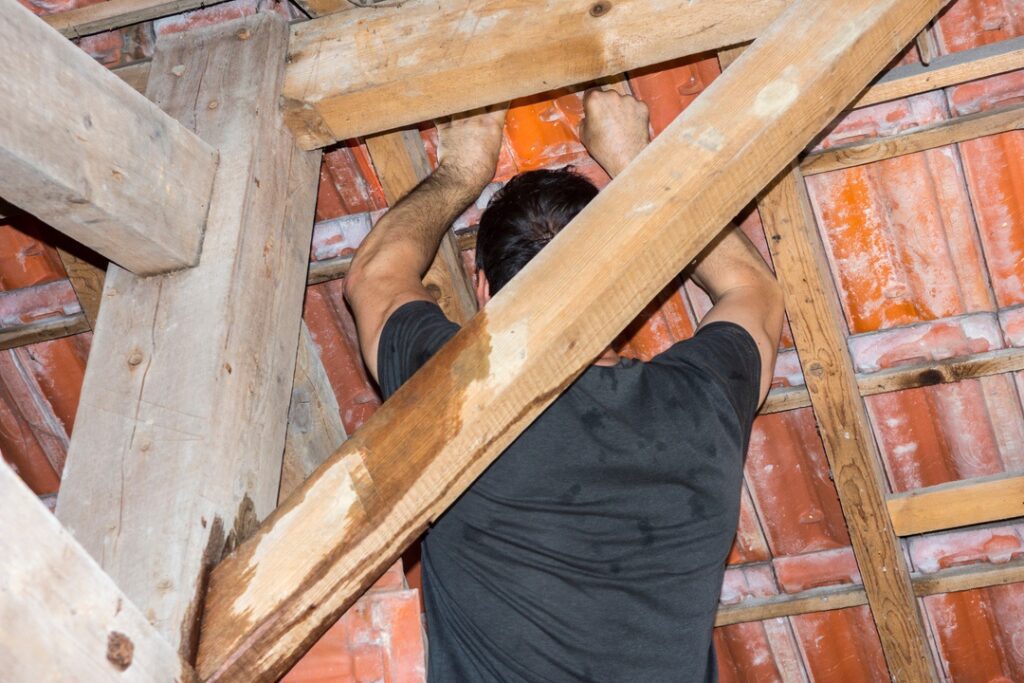
Detecting & Diagnosing Issues
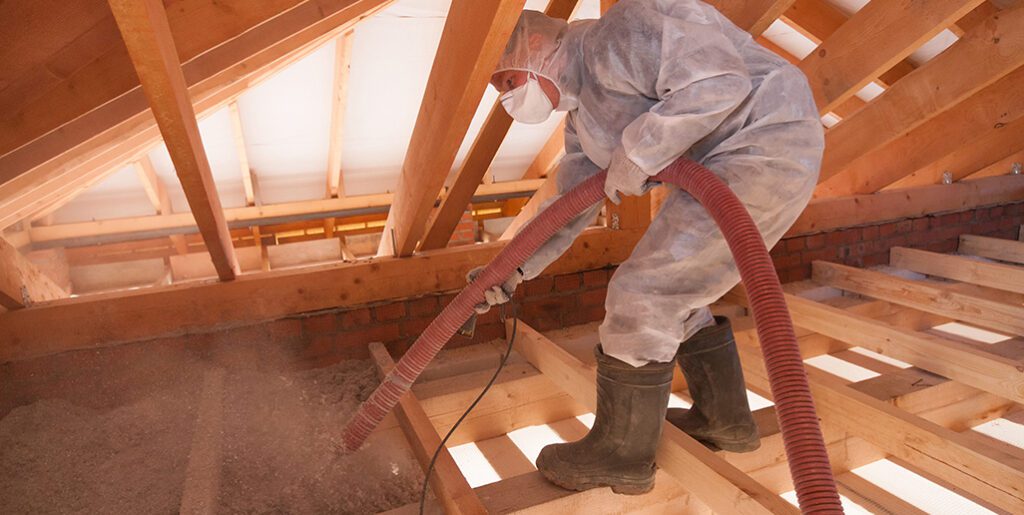
Regular attic inspections are crucial for detecting early signs of attic rain. Thermal imaging technology or simple tactile assessments can help identify areas where moisture is accumulating—but inspecting an attic properly takes time and skill. The Guns N Hoses team provides attic thermal imaging that can show you the specific areas allowing attic rain to occur, and provide tailored recommendations on how to address them.
Long-Term Consequences of Untreated Attic Rain
If you notice signs of attic rain in your home, it’s important to take action fast. Left alone, attic rain can cause:
- Roof Structure Damage: Over time, the moisture can weaken the structure of your roof.
- Mold Growth: Excess moisture is a breeding ground for mold, which can be hazardous to health.
- Reduced Energy Efficiency: Wet insulation doesn't perform well, leading to increased heating costs.
Effective Solutions for Addressing Attic Rain
- Improving Insulation: Newer, more effective insulation materials can help keep warm air where it belongs. Our team can upgrade your insulation to improve the integrity of your attic.
- Adjusting Humidity: Learning the right humidity levels for your home and taking steps to adjust them can help prevent the moisture that causes attic rain from collecting. Consider adding a whole-home humidifier and dehumidifier to your HVAC system so that you can keep the air comfortable while lowering the risk of attic rain occurring.
- Enhancing Ventilation: Ensure you have a proper ventilation system to move moisture out of the attic. Installing solar attic vents can provide the airflow you need while reducing your electricity costs and potentially paying for themselves over time.
- Sealing Air Leaks: Using spray foam or caulk can help seal gaps and cracks that allow warm air to escape. Contact us to have your roof repaired.
FAQ about Preventing & Resolving Attic Rain
What kind of insulation gives the best protection from attic rain?
It's crucial to choose insulation materials that match your home’s needs and climate. At Guns N Hoses, we offer numerous high-quality blow-in fibreglass insulation options from Owens Corning that are ideal for attics, including:
- PINK NEXT GEN™ FIBERGLAS® Insulation
- AttiCat® Expanding Blown-In Insulation
- PROPINK® FIBERGLAS® Blown Insulation
These options are easy, safe, and reliable systems specifically designed for attic use. When you consult with Guns N Hoses about upgrading your insulation, we’ll make a recommendation that works for your home.
How can I keep my attic properly ventilated?
- Make sure to have both intake and exhaust vents.
- Consider installing an attic fan for better air circulation.
- Regularly inspect your attic and have any issues quickly addressed by our professionals.
How can I identify and seal air leaks?
Conducting a "blower door" test can help identify leaks. Here's how to conduct a basic blower door test:
- Close all Windows and Exterior Doors: Make sure the house is sealed off from the outside.
- Install the Blower Door: This is essentially a powerful fan mounted onto an exterior door that sucks air out of your home.
- Run the Test: Turn on the fan. This will lower the air pressure inside your home and force outside air through any unsealed cracks and openings.
- Identify Leaks: Use smoke pens or incense sticks to locate where the air is coming in.
This can be a lot of work, so consider contacting us for help instead—we’ll use thermal imaging and other advanced techniques to find the source of any air leaks in your attic quickly and efficiently.
How much does attic rain cost to fix?
The costs of fixing attic rain vary depending on the severity of the issue and the solution you need. However, the costs of repairing the water damage attic rain can cause are considerably higher than nipping the problem in the bud—so consider it a prudent long-term investment in your home.
By addressing attic rain quickly, you not only protect the structural integrity of your home but also make it a more comfortable and energy-efficient place in which to live. For help with any attic rain issues you’re experiencing, don't hesitate to contact Guns N Hoses. With our support, they’ll soon be a thing of the past.
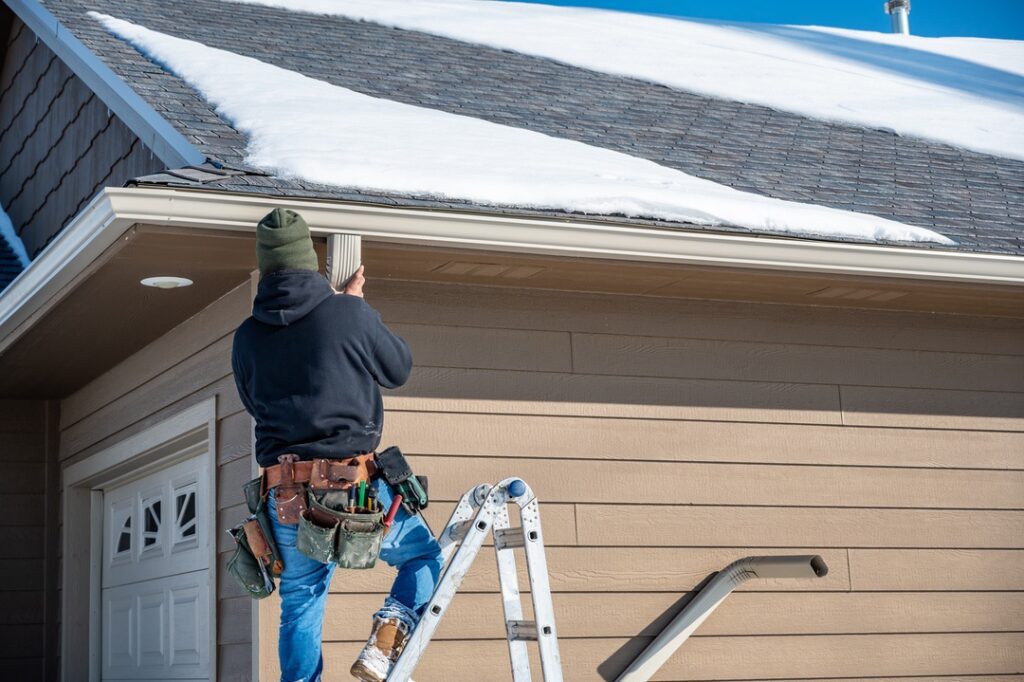
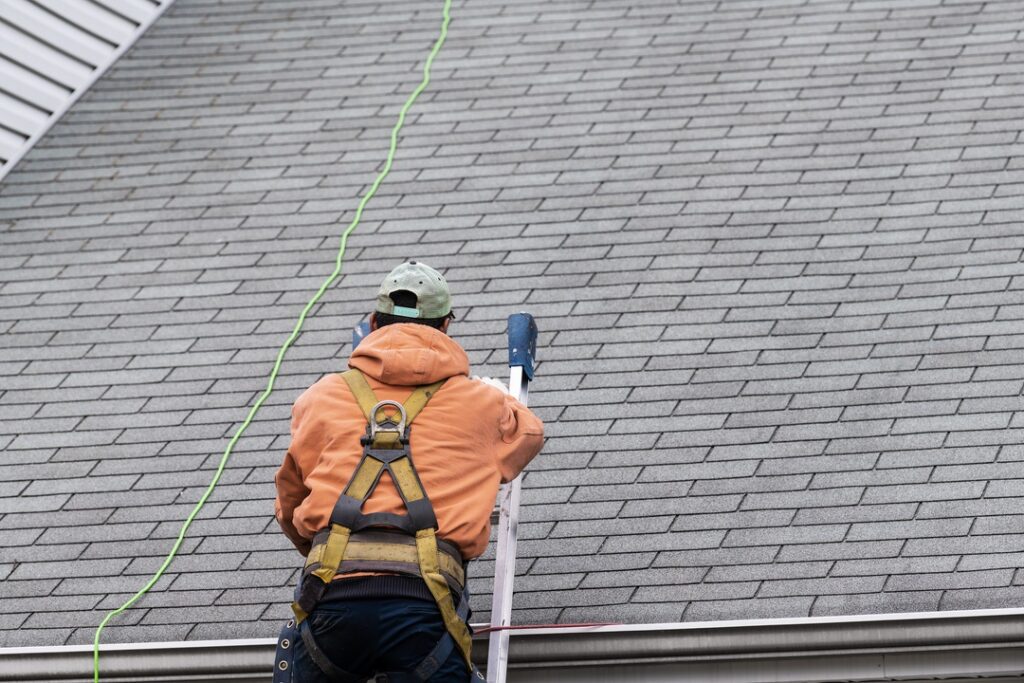
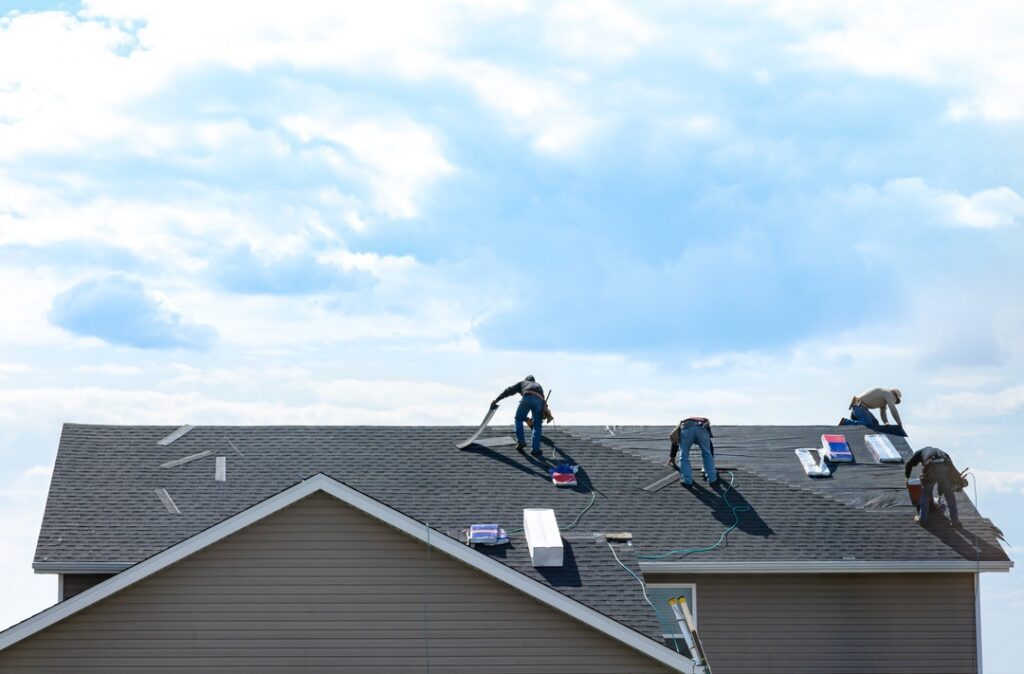
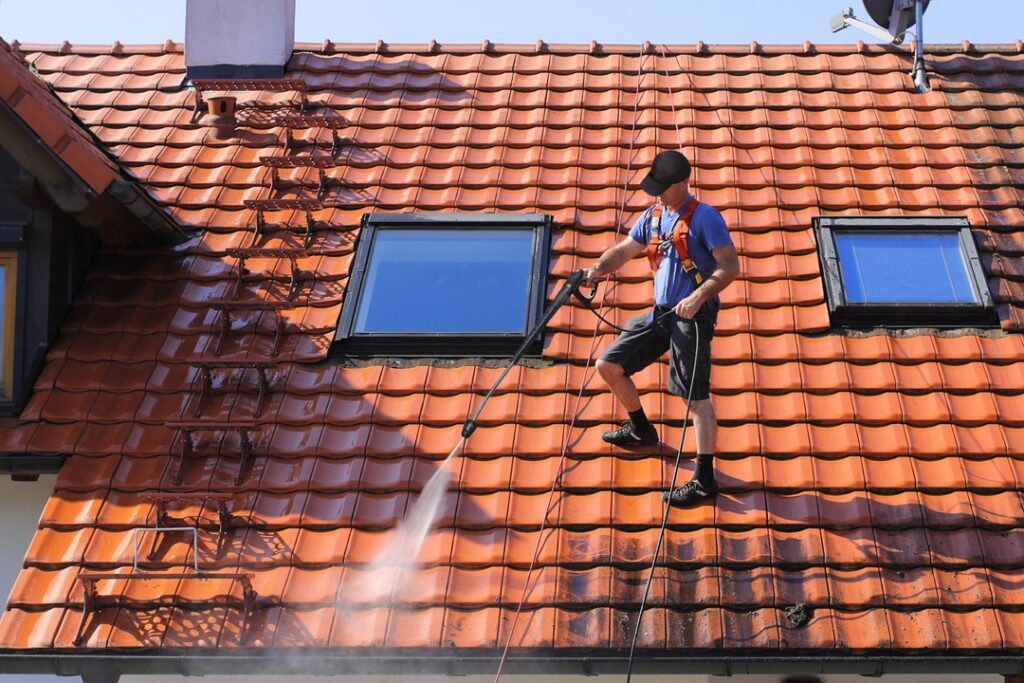
A little roof maintenance can go a long way towards protecting your home, but safety should always be your top priority. Roof work can be hazardous, with potential risks including falls, injury, or damage to the roof itself.
By following a few simple guidelines, you can protect yourself and your property while conducting necessary maintenance. Below, our team of experts at Guns N Hoses walks you through what to do and when to call in experts for roof repairs you shouldn’t try to handle on your own.
Know the Risks of DIY Roof Work
Before we go any further, it’s important to understand that working on your roof carries a certain level of risk. Falling, encountering electrical hazards, and adverse weather conditions can turn a simple task into a potentially dangerous situation. Understanding these risks helps you avoid accidents—when you know what you’re up against, you’re more likely to use the right tools and techniques for the job, or call for help if you feel out of your depth.
How to Tell a DIY Job from a Situation that Requires Pros
Some roofing tasks might be simple enough for a DIY approach, such as cleaning gutters or replacing a few shingles. But most of the more complex jobs, like major repairs or roof replacement, require professional help.
When you’re thinking about doing your own roof work, make sure to think about:
- Your own experience: Have you ever been up on your roof before? How comfortable are you working at heights?
- The tools required: Do you have a good-quality ladder and proper safety gear? Are you wearing the right clothing and footwear?
- The potential dangers involved: Are you prepared for an accident, and is there someone nearby who can help or call for assistance if you get hurt?
Asking yourself the above questions honestly can help prevent dangerous situations. If you don’t like the answers you come up with, put down the ladder and call us instead.
Getting the Right Gear for Safe Roof Work
The right equipment can make roof work safer and more efficient. This includes:
- Ladders: Choose a ladder that is the right height and strength for the job. Extension ladders with adjustable lengths are often preferred for roofing tasks. Ensure the ladder's feet have proper grips and that it's positioned at the correct angle to prevent slipping or tipping over.
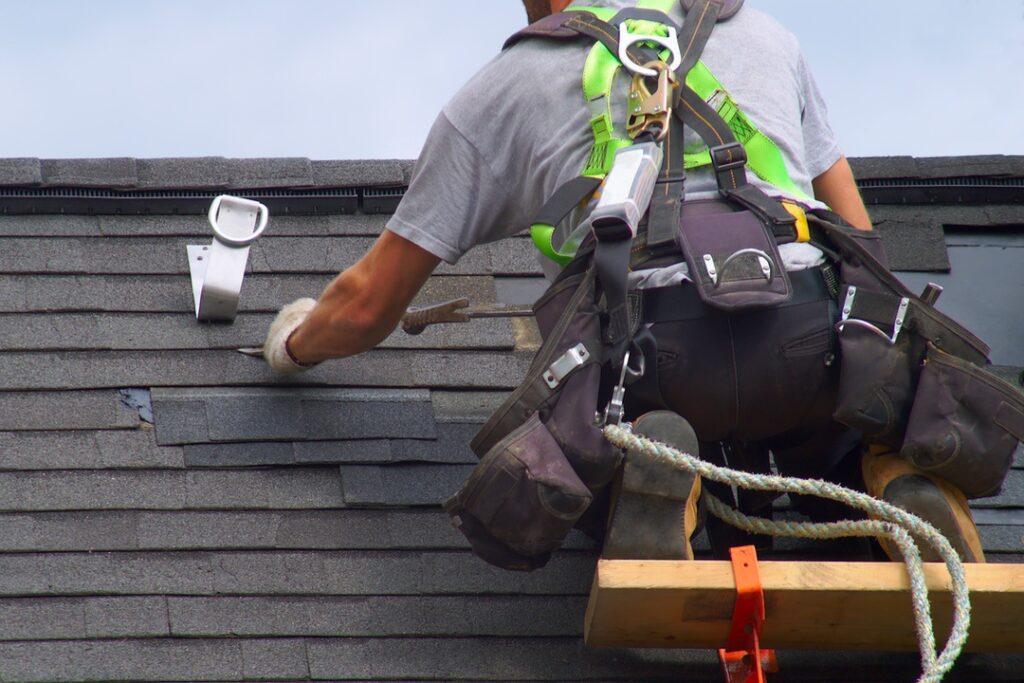
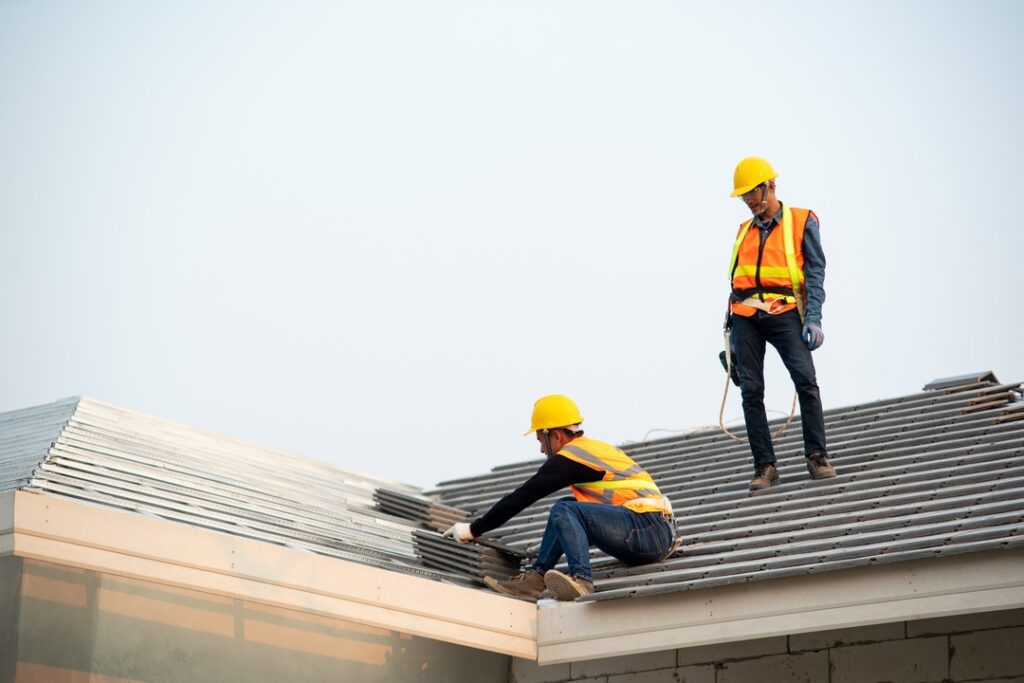
- Roof anchors: These create secure attachment points for safety harnesses and help to prevent falls. However, roof anchors need to be placed carefully to make sure they work properly if you need them, so be sure to consult the manufacturer’s instructions carefully if you decide to use them—and remember, they’re a fail-safe, not a guarantee of safety.
- Safety harnesses: These should be worn correctly and attached securely to your roof anchors. If you are uncertain about how to do this, consider hiring professionals instead—safety gear only works when you understand how to use it properly.
- Non-slip footwear: Footwear with rubber soles and a tread designed to grip uneven surfaces is vital for working on roofs of any kind. Avoid wearing shoes with worn soles, as these may not provide adequate traction.
- Appropriate clothing: Your clothing should be comfortable and allow for easy movement, but also durable and not loose enough to catch. Long sleeves, work pants, and gloves are recommended.
Remember: investing in quality tools and understanding how to use them properly ensures better safety.
Tips for DIY Roofing Success
If you’ve still decided to try doing some roofing maintenance on your own, this advice will help:
Setting Up & Securing Your Ladder
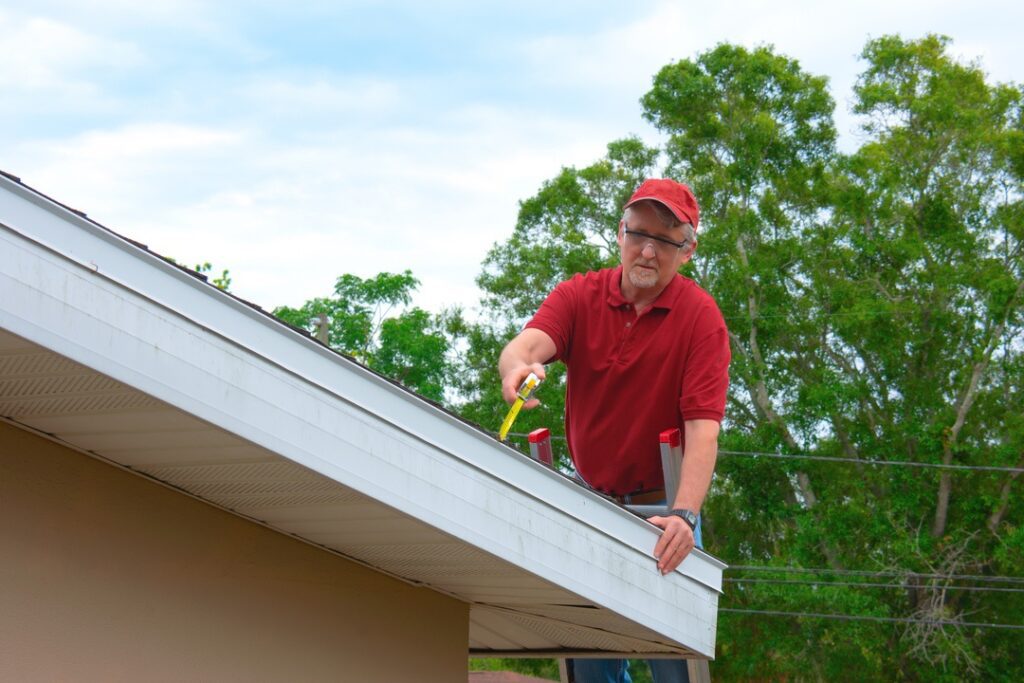
Your ladder will be the primary method of accessing the roof, so it’s important to make sure it’s as stable as possible. The ladder should be placed on a firm and level surface, extended at least three feet above the roof edge, and secured properly to prevent shifting or falling.

Avoiding Power Lines & Electrical Hazards
Do not attempt DIY roofing work near electrical hazards. Special precautions must be taken when working near power lines, antennas, and other such fixtures—as such, it is far better to call a professional who can minimize risk and perform this work safely.
Dealing with Weather Conditions & Unexpected Changes
Roofing work should always be avoided in wet, windy, or stormy conditions, as these can increase the risk of falls or other accidents. We strongly recommend monitoring weather forecasts and being prepared to postpone the work if weather changes unexpectedly.
Maintaining a Clean & Organized Work Area
Keeping the work area clean, organized, and free from unnecessary tools or debris reduces the risk of tripping or slipping. Also, make sure to use a tool belt and clean up after yourself as you go. We also recommend having a designated area to drop refuse and old materials so that people down below can stay out of the way.
Being Ready for Emergencies
When doing any of your own roof work, you should be familiar with basic first aid measures—including how to treat cuts, punctures, and injuries caused by falls. Have a first aid kit on hand and a phone to call emergency services if needed.
Getting Expert Help When You Need It
Recognizing your personal limitations is the key to keeping roof work safe. There’s no shame in recognizing when a task is too complex, risky, or specialized to do on your own—in fact, that’s just good common sense.
If you really want to develop the skills necessary to work on your own roof, consider looking for workshops offered by nearby hardware stores or community associations. A little basic training could make the difference between successful DIY maintenance and an accident that has lasting consequences.
By understanding the risks, using appropriate equipment, and recognizing when to call in professionals, you should be able to tackle simple roof work with confidence. And when you do find yourself needing expert assistance with your roof, reach out to Guns N Hoses—we’ll be happy to help.
Your home is one of the most significant investments you'll ever make, so protecting it is important. That’s typically your roof’s job—but roofs require regular maintenance if you want them to last as long as possible.
Here at Guns N Hoses, we've performed high-quality roof repairs and replacements for years, so we’ve learned plenty about the kind of long-term care roofs like yours need. Here are some practical tips to help you extend the lifespan of your roof so you can count on it for years to come.
1. Regularly Inspect Your Roof
Carrying out regular inspections is a fundamental part of roof maintenance. Ideally, inspections should take place twice a year—once in the spring and once in the fall. This allows you to catch any potential issues before they get worse and require costly repairs. You should also consider inspecting your roof after any severe weather events, as these can often cause unexpected damage.
During your inspection, look out for signs of wear and damage. These may include:
- Missing, damaged or curling shingles
- Rust spots on any metal areas
- Moss or lichen growth
- An excessive amount of material in your gutters
Any of these signs can indicate potential issues that need to be addressed.
See Also:
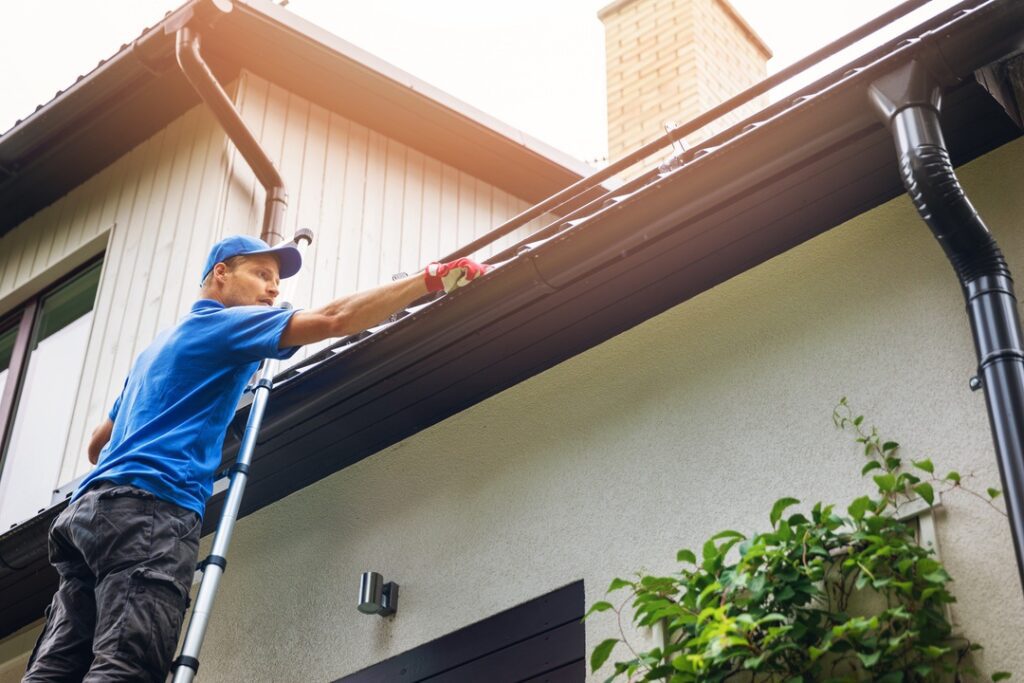
2. Clean Your Gutters
Cleaning your gutters might seem unrelated to your roof, but it actually plays an important role in roof maintenance. Gutters that are clogged with leaves, twigs, and other debris can cause water to back up into your roof system, eventually damaging your roof and even your home's interior.
In addition to cleaning your gutters regularly, make sure to pay extra attention to them in the fall when leaves are more likely to clog them up, and after severe weather events that might cause a build-up of debris. Keeping your gutters clear helps ensure proper drainage and prevents water damage.

3. Remove Debris
Getting debris off your roof is another key maintenance task. Over time, debris such as leaves, branches, and dirt can accumulate and hold moisture against your roofing material. This moisture can create rust and eventually weaken your roofing materials, shortening its lifespan and increasing the risk of mold and mildew growth.
Make it a point to clear debris from your roof periodically, especially after storms or high winds that can deposit an unusual amount of debris. By doing so, you'll promote better drainage and help preserve your rooftop.
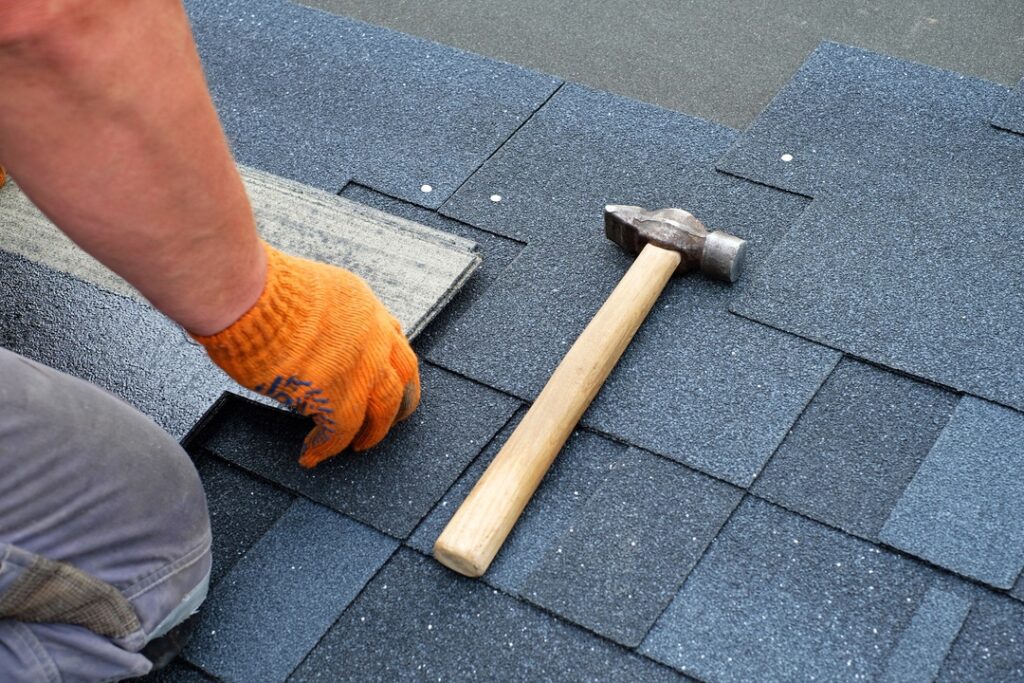
4. Address Minor Issues Promptly
Remember: no roofing problem is too small to address. Seemingly minor roof issues can quickly evolve into significant problems if not dealt with in a reasonable amount of time. For example, small leaks can lead to extensive water damage, while a few damaged shingles can expose your roof deck to the elements, potentially creating much larger problems.
Learning how to replace damaged shingles and seal small leaks can be a great way to maintain your roof in between professional inspections. However, if you're not comfortable doing these tasks yourself, or if the damage seems extensive, it's important to call in a professional right away.
5. Monitor Ventilation & Insulation
Ventilation and insulation play a key role in the health of your roof. Proper attic ventilation and insulation help regulate the roof's temperature and moisture levels. By preventing extreme temperature differences between the attic and the outside, you can avoid common problems like ice damming in the winter and excessive heat in the summer.
Check your attic regularly to ensure the insulation is intact and the ventilation is unobstructed. An inadequately ventilated or insulated attic can lead to a host of roofing problems over time, including premature aging of your roof.
See Also:
6. Invest in Preventive Measures
Preventive measures can significantly increase the lifespan of your roof. Shingles with high-quality protective coatings, for instance, offer added defense against the damaging effects of the sun, water, and physical wear and tear.
While investing in premium shingles might seem like an unnecessary expense, it can pay for itself over time by extending the life of your roof. Many higher-end shingles also have impact-resistant properties and are rated for higher wind speeds, which can make them valuable for Calgary homeowners during the city’s spring and summer hailstorms.
7. Know When to Call Professionals
While there are a number of roof maintenance tasks that you might be able to undertake on your own, some tasks are best left to professionals. Complex repairs, installing protective measures, and even yearly inspections should all be conducted by roofing contractors with professional certifications and enough experience to do the work correctly.
Our professional roofing contractors are members of the Alberta Allied Roofing Association, and are certified by numerous professional organizations and brands—including HAAG, Euroshield, BP, and Velux. When it comes to the health of your roof, knowing when to DIY and when to call in our pros can make all the difference. If you're unsure, it's always safer and often more cost-effective in the long run to give us a call.
Frequently Asked Questions About Rooftop Maintenance
How can I safely access my roof to perform inspections and maintenance?
Use a sturdy ladder that extends at least three feet past the roof's edge. Make sure the ladder is on solid, level ground and, if possible, have someone hold it for extra stability. Consider using safety equipment such as a harness if you're uncomfortable or dealing with a steep or high roof.
What are the maintenance requirements for different roofing materials?
In addition to the steps above, certain roofing materials require specific considerations. For example:
- Asphalt shingles need regular checks for granules in the gutter, as it's a sign of wear.
- Metal roofs should be checked for rust, and any scratches or chips should be sealed promptly.
- Tiles need regular inspections for cracks or breakage.
Regardless of the material, you should always make time for regular cleaning and removing debris.
How can I protect my roof from damage caused by extreme weather events?
Regular maintenance and inspections are the keys to weatherproofing your roof. By keeping gutters clear, removing heavy snow promptly, and ensuring your roof's ventilation and insulation are working properly so that ice dams can’t build up easily, you’ll prevent most inclement weather from wreaking havoc on your rooftop.
Investing in impact-resistant shingles can also help protect your rooftop from hail and blown debris, which are both common risks for Alberta rooftops. Finally, regular inspections are the best way to catch any damage early and prevent it from getting worse.
Remember, your roof protects the rest of your home—so you’ll want to take great care of it for as long as you possibly can! For professional help with your roofing needs, reach out to us at Guns N Hoses. We're always here to help and ready to show you how.
Ventilation might not be the part of your roof you think most about, but it’s surprisingly important. If you're striving for a roof that can offer you years of reliable protection and save you money in the long run, understanding why roof vents matter and what different kinds exist is critical.
Fortunately, as some of Calgary’s most experienced roofing contractors, the Guns N Hoses team is here to tell you all about why roof ventilation matters. Read on as we cover the different kinds, their pros and cons, common signs of ventilation problems, and more.
Why Does Roof Ventilation Matter (& How Does It Work)?
Simply put, the purpose of roof ventilation is to keep a continuous flow of outside air through the attic (or directly beneath the roof deck for homes without attics). This serves two main purposes:
- Keeping your home energy efficient by preventing heat from building up and overworking your cooling equipment
- Preventing moisture from accumulating and potentially causing water damage within your home
Although there are different kinds of vents (which we’ll get to in a moment), the ventilation process works in a fairly straightforward way: intake vents are placed at the roof's lowest point, and exhaust vents are installed at the roof's peak. This setup allows for a natural flow of air, with cool air entering through the intakes and warm, moist air exiting through the exhausts.
Different Types of Roof Ventilation Systems
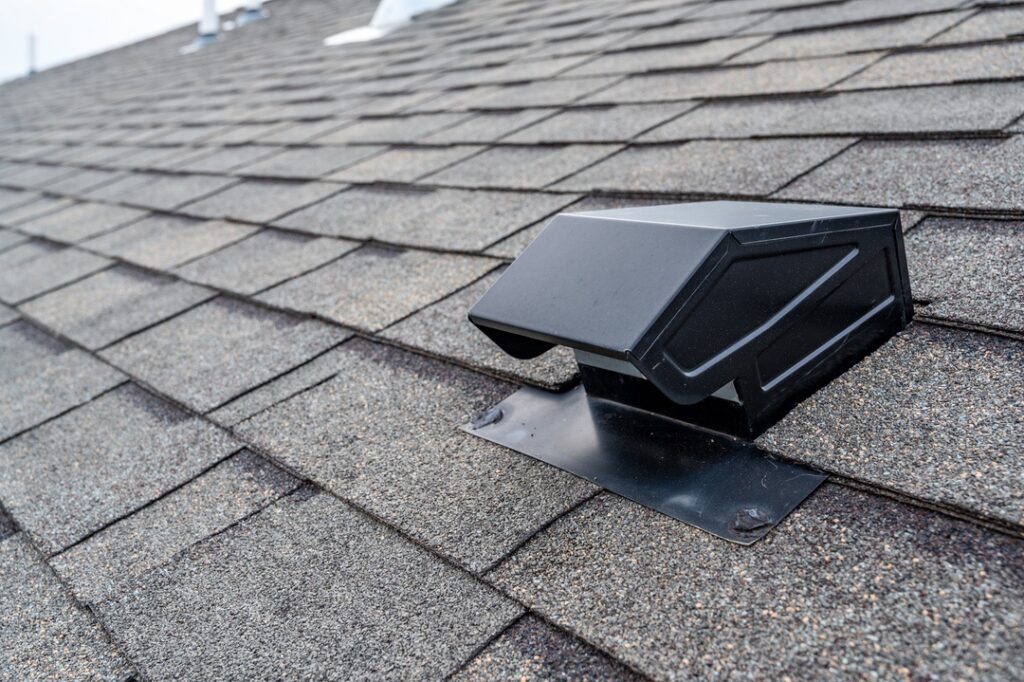
There are several types of roof ventilation systems available, such as:
- Solar Vents: These innovative vents use solar power to pull hot air out of your home’s upper levels and bring cool air in.
- Ridge Vents: These are installed along the ridge line, or peak, of your roof. Ridge vents run the entire length of the ridge, allowing warm, moist air to escape from the highest point in your attic.
- Soffit Vents: Soffit vents are installed in the eaves of your roof, allowing cool air to enter the attic. They're typically placed along the underside of your home's overhangs.
- Gable Vents: As the name implies, gable vents are installed in the gable ends of a house. They allow air to circulate freely in the attic, acting as an exhaust for hot air.
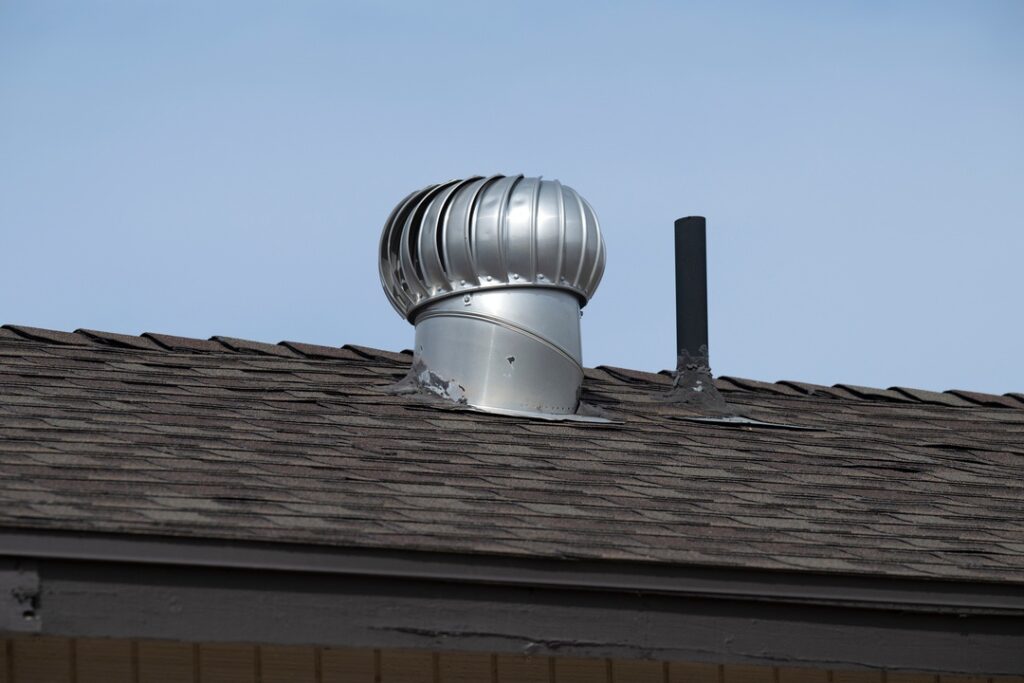
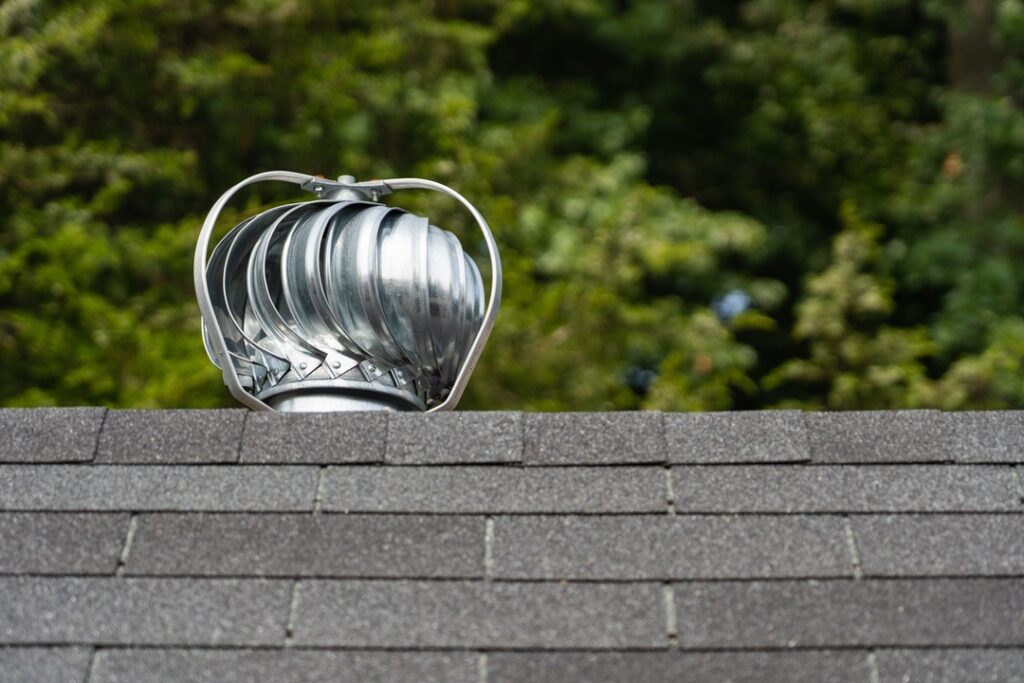
- Turbine Vents: These are dome-shaped vents that use wind power to create a strong updraft of air. Turbine vents are effective in expelling hot air and promoting air circulation in the attic.
While the above differ in design and placement, their functions revolve around the same principle of circulating air to eliminate excess heat and moisture. Solar vents take a unique approach to this concept by using solar energy to actively circulate air through your attic, which effectively reduces the risk of air settling under your roof and becoming trapped.
The Benefits of Proper Roof Ventilation
Preventing heat and moisture buildup under your roof with proper ventilation has a few side benefits as well. These include:
- Keeping your attic cool during the summer
- Reducing your energy consumption and saving you money on your energy bills
- Lowering the odds of pests that are drawn to moisture infesting your attic
Effects of Inadequate Roof Ventilation
Ignoring the ventilation of your roof can lead to a host of problems, including:
- Mold growth due to excess moisture
- Condensation problems
- Ice dams in winter
- Reduced energy efficiency due to trapped heat
- Possible pest problems from cockroaches, silverfish, and others
Signs of a Ventilation Problem
Many of the problems above are noticeable signs that you might have an issue with your roof’s ventilation. But here are a few other signs that something might be wrong:
- Musty or moldy odors in your home
- High energy bills
- Curling or buckling shingles
- High levels of humidity in your attic or on upper floors
Assessing Your Roof Ventilation System
The general rule of thumb according to industry best practices is to have 1 square foot of vent area for every 300 square feet of attic floor space. However, note that these ratios can change based on different factors like whether the attic has a vapor barrier or the slope of the roof.
The best way to assess the health of your roof’s ventilation system is to contact our professional roofers, who can tell you definitively if you have problems that need to be addressed.
However, it’s easy to get a basic idea of whether your roof vents are working by yourself—simply check for visible signs of damage, make sure your vents are unblocked, and keep an eye out for the issues mentioned above.
Improving Your Roof's Ventilation
Remember, it's important to consider the balance of intake and exhaust vents for optimal airflow. It may also be worth upgrading from passive vents (like ridge, soffit, and gable vents) to a more active solution like solar vents, as these can be more effective at cycling air in and out of your home.
Long-Term Consequences of Ignoring Ventilation Issues
On the other hand, ignoring roof ventilation issues is all too easy—and it can result in expensive problems. These include:
- Having to make structural repairs due to moisture damage
- Decreasing the lifespan of your roof due to shingle deterioration
- Increasing your home’s cooling costs as heat becomes trapped indoors
Costs & Savings of Ventilation Improvement
The costs of improving your roof's ventilation will vary based on the type and extent of the upgrades. However, these upgrades could result in substantial energy savings over time (over 10% of your cooling costs for some homes), as well as an increased lifespan for your roofing materials—both of which can offset the initial investment in the long run.
If you’re looking for a cost-effective way to upgrade your roof ventilation or simply haven’t checked it in a while, it might be time to reach out to our professional roofing contractors. We’ll be able to offer expert advice tailored to your specific situation and recommend a solution that fits your needs and budget.
A leaking roof is more than just an annoyance that can cause dripping water indoors—it’s also a potential safety hazard that can seriously impact your home’s value if it’s not dealt with quickly. That makes spotting roof leaks early essential for conscientious homeowners, as well as knowing what to do when you recognize one.
Below, our team explains how to discover roof leaks, and what you can do to slow them down so that their impact is minimized until you can schedule professional roof repair. Read on and learn how to keep the roof over your head safe and sound.
Common Causes of Roof Leaks
Roof leaks can be caused by various factors, including:
- Damaged or missing shingles: Harsh weather, falling debris, or improper installation can lead to damaged or missing shingles, exposing the roof's underlayment and decking to water intrusion.
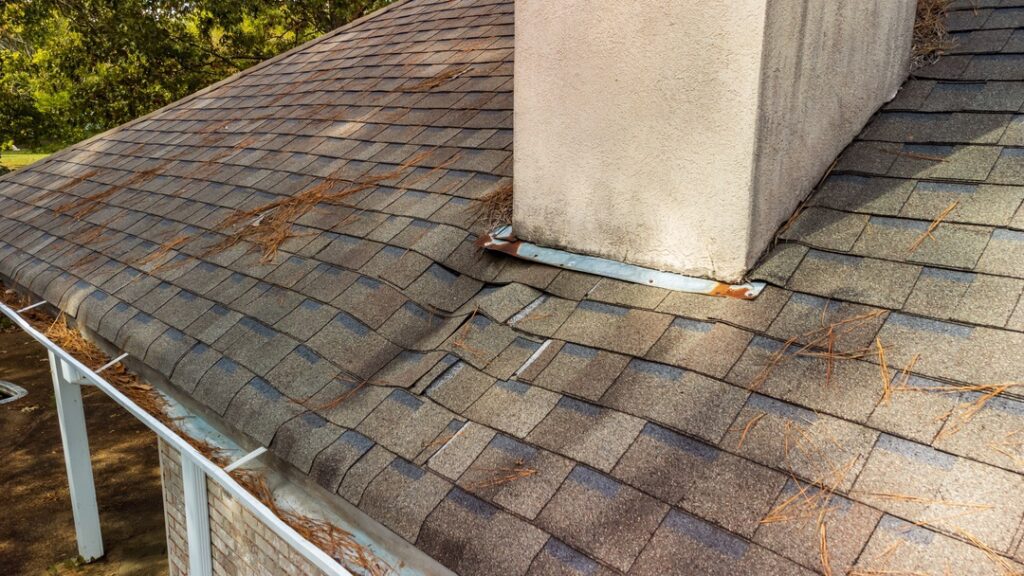
- Cracked or deteriorated flashing: Flashing is a protective barrier installed around roof penetrations such as chimneys and vents. Over time, flashing can crack or deteriorate, allowing water to seep in around these vulnerable areas.
- Clogged gutters and downspouts: Leaves, debris, and dirt can clog gutters and downspouts, preventing proper water drainage. When water overflows, it can damage the roof's edges or find its way under the shingles.
- Poorly sealed vents and skylights: Vents and skylights require proper sealing to prevent water intrusion. If not sealed correctly, they can become entry points for water, leading to leaks.
- Ice dams in colder climates: In Calgary’s cold climate, ice dams can form at the roof's edge in winter, trapping melting snow and ice. This water can then seep under shingles and cause leaks or damage to the roof's structure.
- Damaged roof decking or underlayment: The roof decking and underlayment serve as crucial barriers against water infiltration. If damaged by rot, pests, or other factors, they can no longer protect the interior of the home from leaks.
- Age and general wear and tear: As roofs age, materials can deteriorate, and seals can weaken, making the roof more susceptible to leaks. Regular maintenance and timely repairs can help prolong the roof's lifespan and prevent leaks.
Signs that May Indicate a Roof Leak
Here’s what to look out for when you’re trying to find the source of a likely roof leak:
- Water stains on ceilings or walls
- Mold or mildew growth
- Damaged or discolored shingles
- Peeling or bubbling paint
- Wet insulation in the attic
- Damp spots in the attic or crawlspace
How to Inspect Your Roof for Potential Leaks
It’s best to take a thorough and systematic approach to checking your roof for leaks. Here are the steps we recommend:
- Perform visual inspections twice a year, ideally in spring and fall: Regular inspections can help detect minor issues before they become major problems, ensuring the roof remains in good condition and extending its lifespan. Start by examining the roof's exterior for visible damage. If you have a sloped roof, you may be able to view it from the ground—otherwise, you’ll probably need to access your rooftop for a closer look.
- Check for damaged or missing shingles: Identifying damaged or missing shingles early can help you prevent water infiltration and minimize the risk of leaks by replacing them as soon as possible.
- Inspect the flashing around vents, chimneys, and skylights: Regularly checking the flashing ensures it remains in good condition and maintains a watertight seal, preventing leaks around vulnerable roof penetrations.
- Examine gutters and downspouts for blockages: Clearing gutters and downspouts of debris allows for proper water drainage, reducing the risk of leaks and water damage to the roof's edge and structure.
- Look for signs of leaks inside the home and in the attic: Early detection of water stains, mold, or damp spots can prevent extensive interior damage and help identify the source of the leak, making it easier to repair quickly.
Required Tools & Equipment
To inspect your roof properly, we recommend that you use the following items:
- Binoculars
- A ladder
- A flashlight
- A moisture meter
- A roofing tarp or plastic sheeting (for temporary leak mitigation)
Safely Accessing Your Roof
To reach the top of your roof safely, keep the following tips in mind:
- Use a sturdy ladder with proper safety features
- Wear non-slip footwear
- Use a safety harness (especially if working on a roof with a steep slope)
- Avoid climbing onto your roof during inclement weather or high winds
How to Slow Down a Leak in Your Roof
Once you’ve found a leak in your roof, the next step is to prevent it from causing further water damage while you wait for professional help to arrive. Here’s what you should do:
- Place a bucket or container inside the house to catch dripping water underneath the leak.
- Use towels or rags to soak up excess water that has already entered your home
- Cover the leaky part of your roof with a tarp or plastic sheeting until it can be properly repaired
When to Call a Professional Roofer for Help with Leaks
The sooner you call a professional for roof repairs after you’ve discovered a leak, the less likely it will be to cause major water damage in your home. You can also skip right to calling for help if you know there’s a leak but can’t find the cause, or if you don’t feel comfortable climbing onto your roof by yourself.
Contact Guns N Hoses to learn more about our efficient approach to roofing repairs in Calgary. With our help, you’ll be able to make sure your roof stays safe from leaks and their effects for years to come.
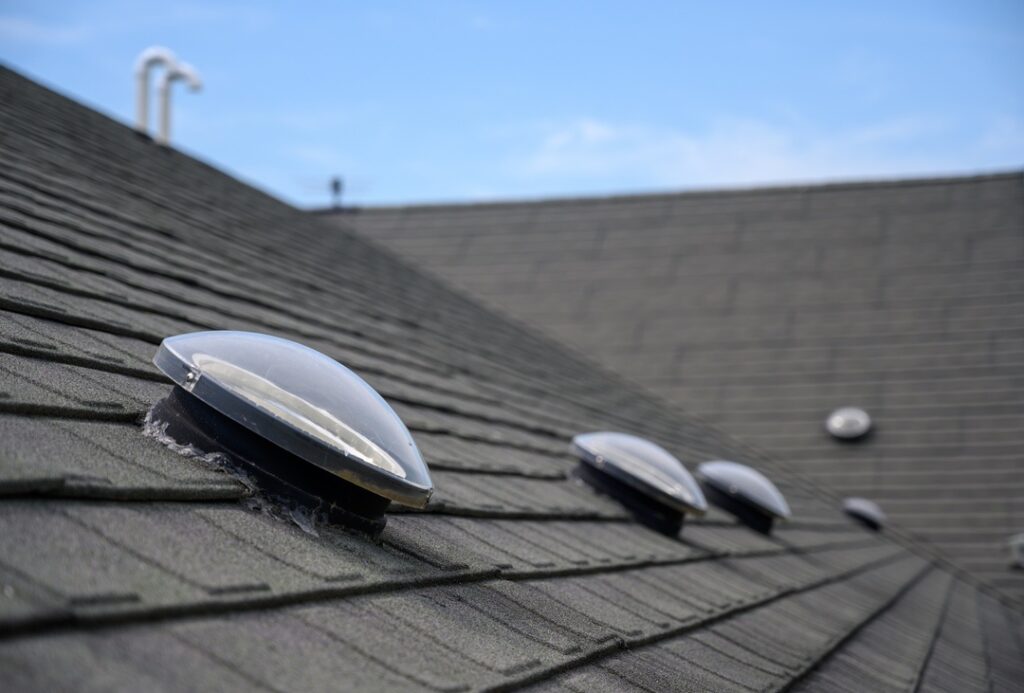
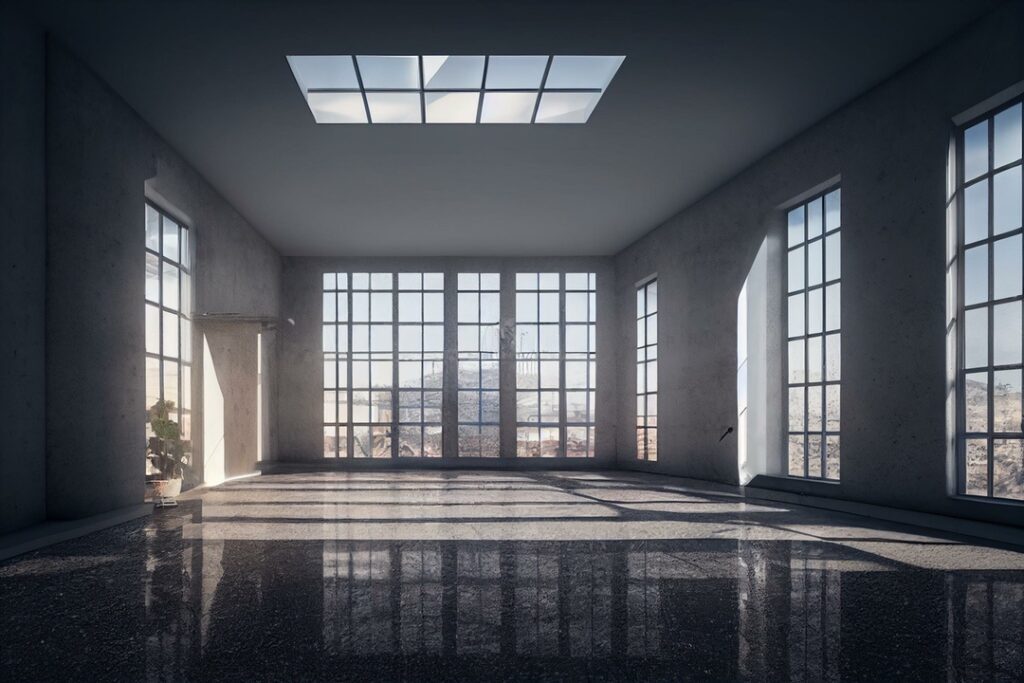
Natural light is good for your mood, and it also makes your rooms and hallways look flattering and inviting. Sun tunnels are growing in popularity with Calgary residents because they make it possible to enjoy cost-effective natural lighting indoors.
But how do sun tunnels work, how much do they cost, and how much maintenance do they need? Don’t worry; the Guns N Hoses team is here to answer your questions. Read through our ultimate guide to sun tunnels for Calgary homeowners below so you can make an informed decision about whether or not to add one to your home.
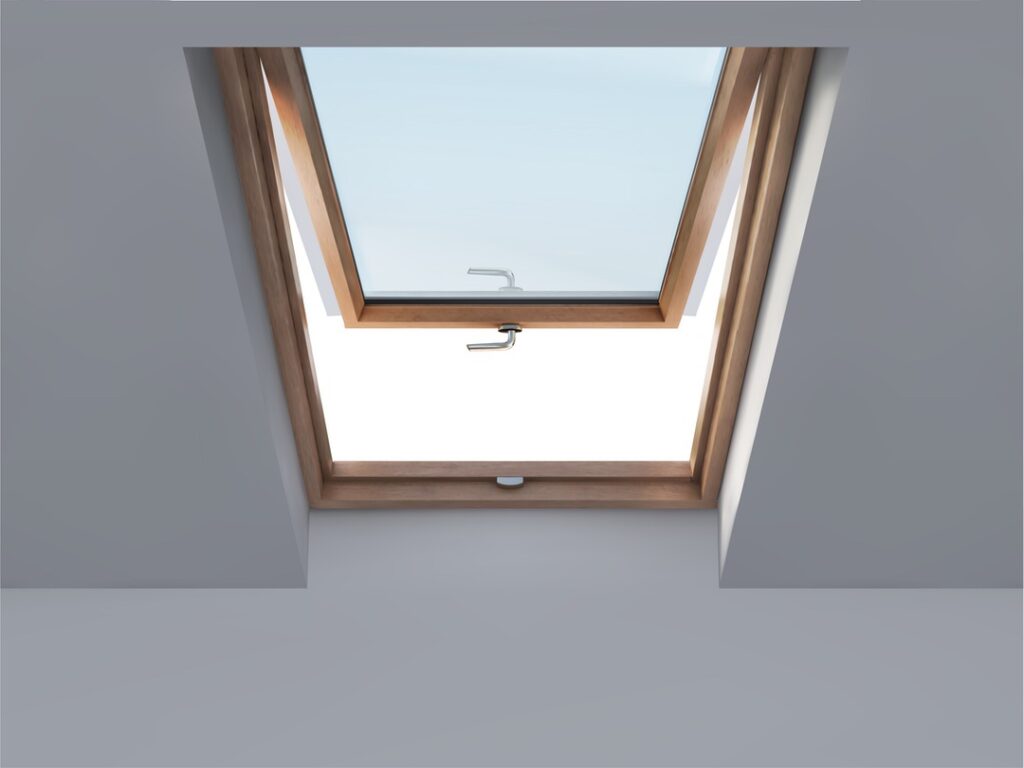
What Is a Sun Tunnel?
Sun tunnels, also known as solar tubes or tubular skylights, are natural lighting solutions that capture sunlight and direct it into your home through a reflective tube. They are designed to provide a convenient and energy-efficient way of brightening up dark spaces in your home with natural light.
How Sun Tunnels Work
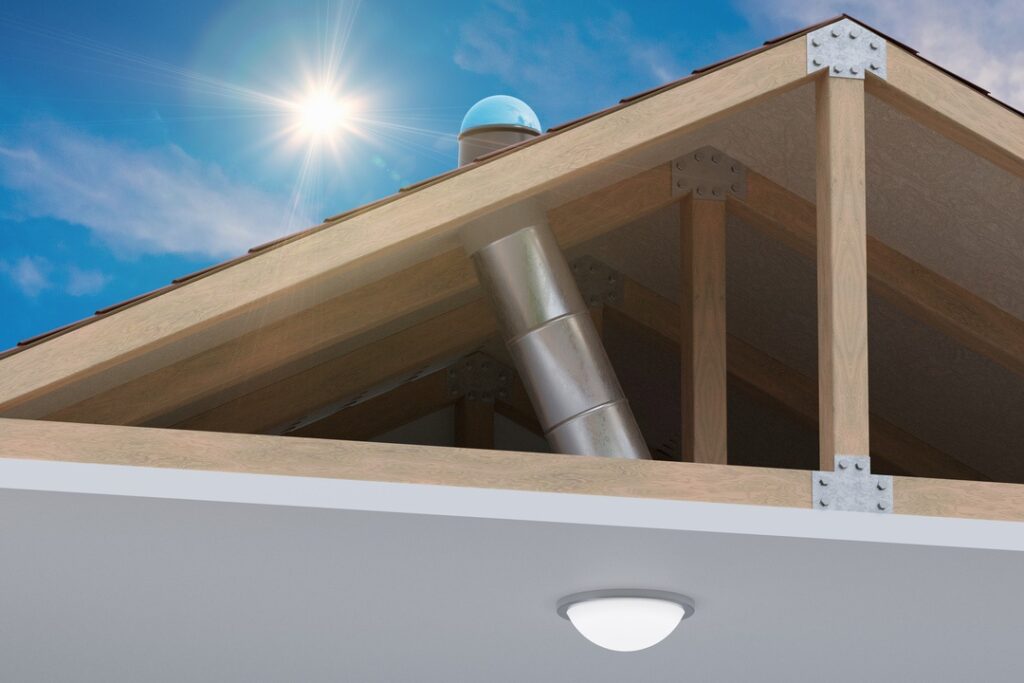
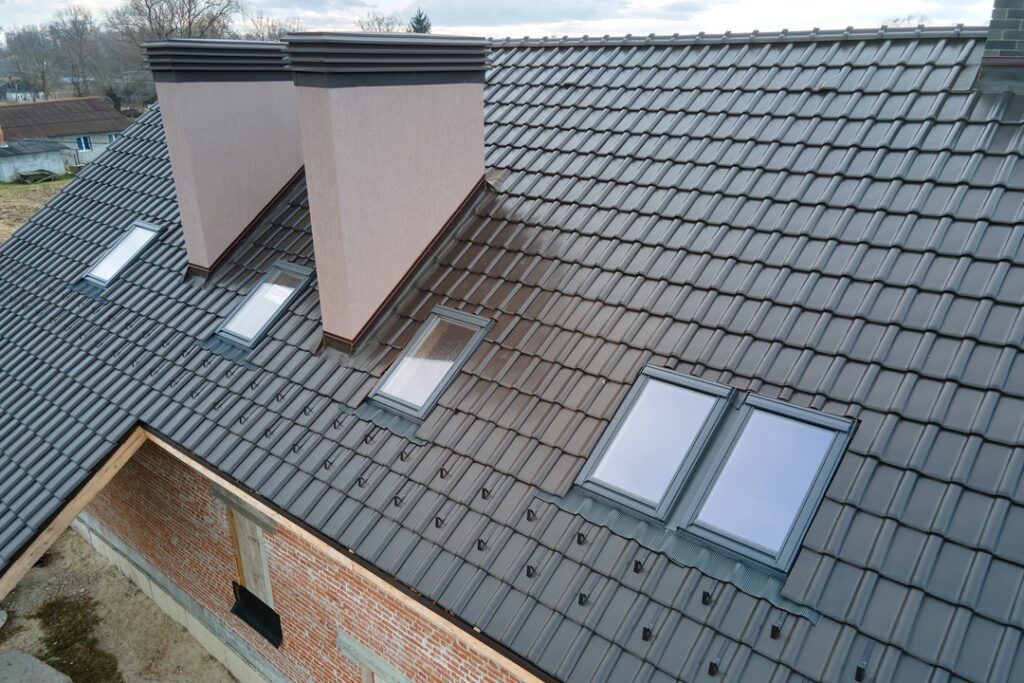
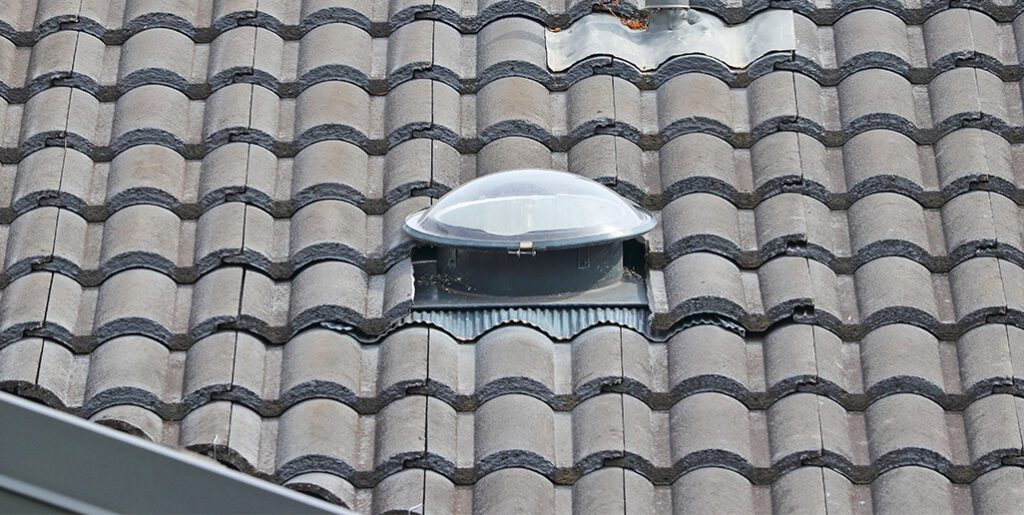
Sun tunnels consist of a dome-shaped, weather-resistant capture device mounted on the roof, which collects sunlight. The sunlight is then reflected down a highly reflective tube that runs through the attic or other spaces and finally diffuses the light into your home through a diffuser or lens. This process helps to evenly distribute the light and minimize heat gain or loss.
The Benefits of Sun Tunnels for Calgary Homeowners
Calgary has the highest number of sunny days per year out of any city in Canada—so sun tunnels can be a cost-effective way to illuminate the inside of your home on a consistent basis. They also provide several other advantages, including:
- Quick and easy installation: Sun tunnels have a simple design with few components, making them quicker to install than traditional skylights. They do not typically require major structural modifications, and their flexible, reflective tubes can be easily navigated through tight spaces in the attic.
- No heat loss: Sun tunnels have insulated, double or triple-glazed diffusers, which minimize heat transfer. This design feature helps to maintain the home's interior temperature and prevents heat loss or overheating.
- Low maintenance: Sun tunnels require little to no maintenance due to their durable, weather-resistant materials and self-cleaning dome design. Occasional inspection and cleaning of the exterior dome and interior diffuser are typically all that's needed.
- Design options: Sun tunnels offer various design options, such as different sizes, tube lengths, and diffuser styles. Customization features, like dimmers or decorative fixtures, can also be added to match the homeowner's preferences and interior decor.
The Costs of Sun Tunnels in Calgary
Installation Costs
The cost of a sun tunnel can range from several hundred dollars to over a thousand, depending on several factors. These include:
- Sun tunnel size and type: Different sun tunnel sizes and types have varying costs. Smaller, more basic sun tunnels tend to be more affordable, while larger, more advanced models can be more expensive.
- Roof type and slope: The type of roof and its slope can affect the installation complexity, and therefore, the cost. Steeper or more complex roofs may require additional labor or specialized equipment, increasing the overall cost.
- Installation complexity: Some installations may require modifications to your home's structure, such as framing, drywall work, or electrical work. These additional services can increase the overall cost of the project.
- Additional features: Customization options, such as adding a dimmer, ventilation fan, or decorative fixtures, can also impact the final price.
- Labor and materials: The cost of labor and materials in your area can also influence the total cost of the project.
To get an accurate estimate for installing a sun tunnel in your Calgary home, we recommend contacting Guns N Hoses for a consultation. Our team members will be able to assess your specific needs and provide you with a detailed quote tailored to your home and preferences.
Maintenance Costs
While sun tunnels are known for being low maintenance, you may occasionally need to spend a small amount of money (and time) to keep them in shape over the course of their lifetime. Factors contributing to sun tunnel maintenance costs in Calgary can include:
- Periodically cleaning the exterior dome and interior diffuser
- Potential repairs after weather-related damage
- Replacing worn or damaged components over time
Always follow the manufacturer's guidelines for maintenance. This will keep your sun tunnel working efficiently and providing reliable natural light for years.
Frequently Asked Questions about Sun Tunnels in Calgary
Can sun tunnels be installed on any type of roof?
Sun tunnels can be installed on most roof types, including shingle, metal, and tile roofs. However, the installation process may vary depending on the roof material and slope.
Do sun tunnels work on cloudy days or during the winter months?
Yes! Sun tunnels can still provide a significant amount of natural light during cloudy days and winter months, though the light intensity may be lower compared to sunny days.
Can a sun tunnel be installed in a multi-story building?
While it's possible to install sun tunnels in multi-story buildings, the efficiency and light transmission may decrease as the length of the reflective tube increases. If you want to add a sun tunnel leading from your roof to a lower story, consult us to find out how feasible the project is and what will be involved.
How much money can a sun tunnel save me on lighting costs?
Sun tunnels can significantly reduce your reliance on artificial lighting during daytime hours, which leads to energy savings. Most homeowners can expect to save anywhere from 10% to 30% on electricity for lighting by using natural light from sun tunnels—but actual savings will vary based on your specific conditions and usage patterns.
Can sun tunnels withstand Calgary's harsh weather?
Yes—our high-quality sun tunnels are designed with durable, weather-resistant materials to withstand harsh weather conditions, including heavy snowfall and hailstorms. Working with us to put a sun tunnel in your home ensures that you receive a quality product and that it gets installed correctly, reducing the likelihood that it will be damaged by inclement weather.
Do sun tunnels increase the risk of ice dams or leaks in Calgary's cold climate?
When installed correctly by our professionals, sun tunnels should not increase the risk of ice dams or leaks. Our sun tunnels are designed with proper insulation and flashing to prevent condensation, heat loss, and potential leaks.
How to Install a Sun Tunnel that Brightens Up Your Home
Now that you know how sun tunnels work and what you can expect when installing or maintaining one, you’ll be able to seriously consider them as a way to enjoy beautiful natural light indoors. The next step is to make sure your sun tunnel project is carried out by experts—so that it can light your home effectively and you can count on it for years to come.
Contact Guns N Hoses to learn more about how we install sun tunnels for Calgary residents. We’ll provide you with recommendations based on your needs and accurate quotes for our work.
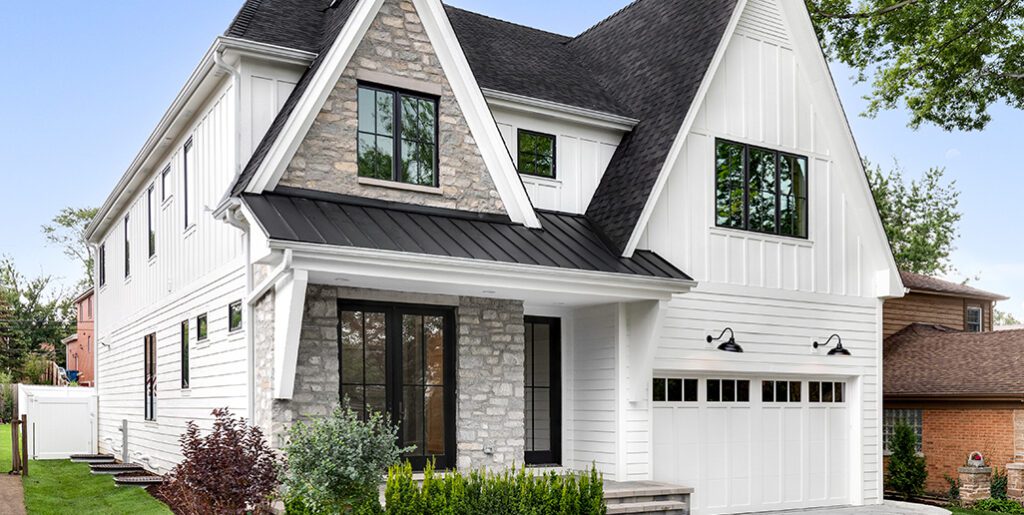
Your roof keeps out the rain, helps ensure your home’s structural integrity, and is a vital part of your property’s curb appeal—so protecting it from debris and inclement weather is essential for maintaining your investment. Impact-resistant shingles offer more durability than standard varieties—but is Calgary’s weather rough enough that you should consider using them for your next roof replacement?
As Calgary’s local roofing experts, our professionals at Guns N Hoses roofing have installed all kinds of shingles on homes throughout the city. We’ve seen the difference impact-resistant shingles can make up close, so we’re here to walk you through their costs and benefits to help you make an informed decision about how best to protect the roof over your head. Ready? Hail yeah—let’s go.
What Are Impact-Resistant Shingles?
Impact-resistant shingles are shingles specifically designed to withstand extreme weather conditions, such as:
- High winds
- Hail
- Flying debris
Unlike traditional three-tab and architectural shingles, which are made primarily of asphalt or fiberglass, impact-resistant shingles are made of more durable materials. They often use asphalt modified with a synthetic rubber-based polymer called SBS, which makes the shingles more flexible in a wide range of temperatures and less likely to crack when struck by objects.
The Benefits of Impact-Resistant Shingles
Homeowners who use impact-resistant shingles on their rooftops can experience the following benefits:
- Higher durability: In addition to their increased resistance to being struck by flying objects (see above), impact-resistant shingles are rated for higher wind speeds than traditional varieties. Standard shingles are typically suited for lower wind speeds, whereas impact-resistant shingles can often handle winds up to and even exceeding 200 km/h.
- Lower maintenance and repair costs: standard shingles have an average lifespan of 15-20 years, depending on specific weather conditions in your area and how well you take care of your roof. Impact-resistant shingles may last up to 30 years or more under similar conditions.
- Increased property values: since impact-resistant shingles provide better protection for your rooftop, they can be used as a selling point when putting your house on the market. Consult with your real estate agent or broker for details on how much adding impact-resistant shingles to your roof could boost the value of your home.
- A more robust appearance: impact-resistant shingles often have a thicker and more three-dimensional appearance than standard asphalt shingles, which can make your roof look more sturdy and appealing.
- Insurance Company Discounts ****
How Much Do Impact-Resistant Shingles Cost?
The costs of installing impact-resistant shingles on your rooftop will depend on several factors, including the square footage, shape, and slope of your roof. In many cases, impact-resistant shingles cost $7-$8 per square foot to install on Calgary rooftops, slightly more than standard shingles, which normally cost $5-$6 per square foot to install.
However, bear in mind that these numbers are only approximations, and that the best way to predict the costs of putting impact-resistant shingles on your rooftop is to call us for a quote. We’ll ask you specific questions about your roof and home to provide you with a quote you can trust.
Comparing the Long-Term Costs of Impact-Resistant and Standard Shingles
While impact-resistant shingles are more expensive than standard shingles, it’s possible for them to last twice as long. Since they only tend to be about 1/3rd more expensive on average, you can actually save money in the long run by having impact-resistant shingles installed on your roof. Here are two examples to illustrate, using a typical Calgary roof size of about 1500 square feet:
- $6 per square foot for standard shingles x 1500 square feet = $6000 over 15 years or $600 per year
- $8 per square foot for impact-resistant shingles x 1500 square feet = $9000 over 30 years or $400 per year
So as long as you plan to continue living in your home and take the time to maintain your roof properly, impact-resistant shingles are often an excellent investment. This is even more true when you consider Calgary’s erratic weather conditions.
Do You Need Impact-Resistant Shingles in Calgary?
While it’s true that Calgary is Canada’s sunniest major city (with an average of 333 days of sunshine per year), that doesn’t mean the weather here is always gentle. In fact, Calgary is located smack-dab in the middle of “hail alley”—Canada’s most common region for hailstorms. On average, 5 hail storms hit the city every year, causing billions of dollars in damages to homes, businesses, vehicles, and other property.
Making the investment in impact-resistant shingles can save you money in the long run while protecting your home effectively and boosting its appearance. To learn more about the process of upgrading your roof for Calgary’s climate and conditions, contact Guns N Hoses and get in touch with one of our exterior experts.
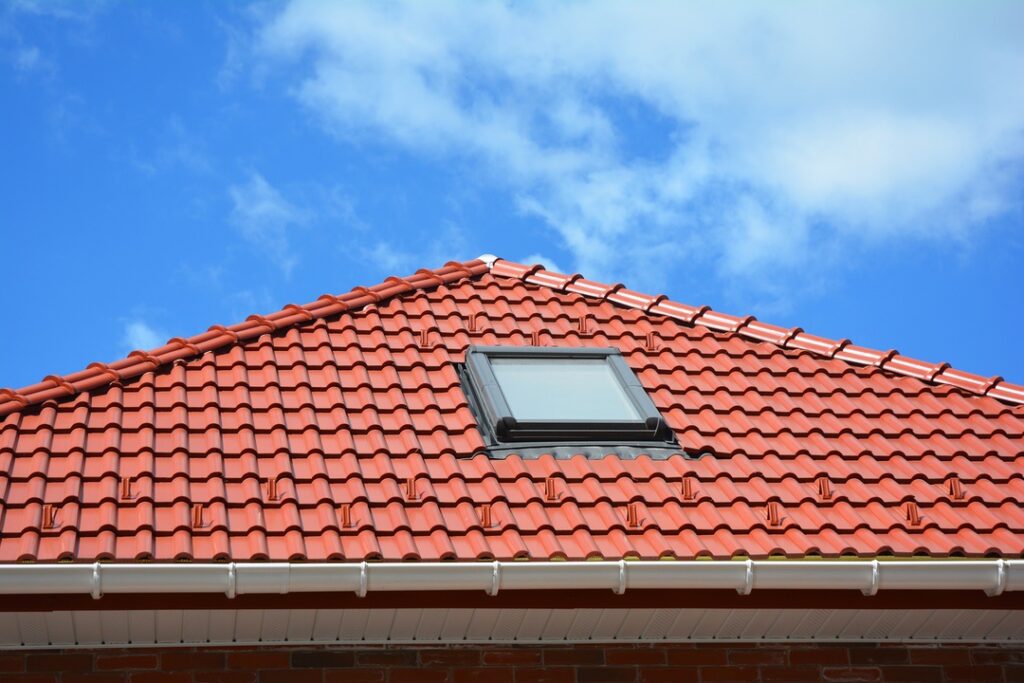
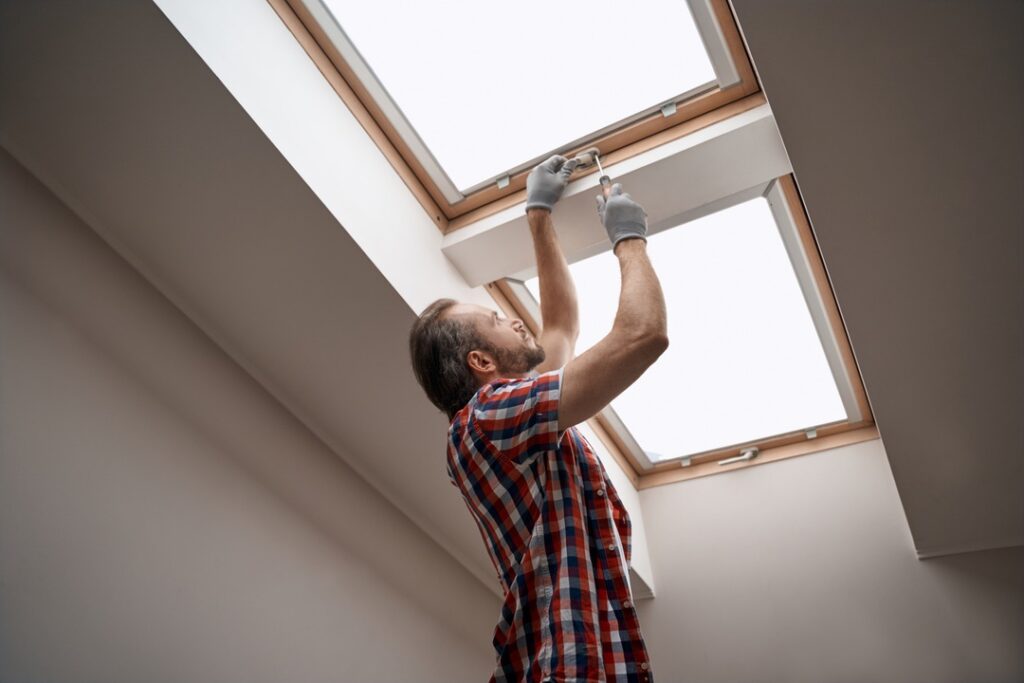
Skylights are beautiful, but some Calgarians have concerns about having them installed. That’s because there are plenty of myths circulating about skylights—for example, that they’re expensive, difficult to maintain, or that they leak. Fortunately, none of those things are true if you have your skylight installed properly by qualified professionals.
Guns N Hoses has performed countless successful skylight installations in Calgary, so we know firsthand how valuable they can be. Join us as we bust some of the most common myths about skylights below, so that you can make an informed decision about whether to install one in your home—based on facts and not fears.

Myth #1: Skylights Let In Too Much Heat
Modern skylights are designed with energy-efficient glass and seals, which help regulate indoor temperature by reducing heat transfer. The use of low-E coatings and double-paned glass can reduce heat transfer by up to 50%.
Skylights with ventilation options can provide additional control over temperature. In fact, a well-designed skylight can actually help reduce energy costs by reducing the need for artificial lighting and heating.

Myth #2: Skylights Leak When It Rains
High-quality skylights are installed with proper flashing and seals, reducing the likelihood of leaks. The skylights we install at Guns N Hoses are able to withstand the elements, including heavy rain and strong winds.
In fact, we test all skylights we install at the end of each job to ensure their ability to resist water and withstand wind loads. Our use of high-quality materials and proper installation techniques significantly reduces the risk of leaks and helps you enjoy your new skylight with maximum peace of mind.
Myth #3: Skylights Are Difficult to Install
It’s true that skylights should only ever be installed by professionals—however, this process has become simpler and more streamlined over the years. Advancements in technology have made skylights easier to install, which reduces the time required for the installation process and results less of a disruption to your routine.
Our skylight installations typically take only a few hours to a day, depending on the specifics of your home. For an accurate estimate of how long installing your new skylight will take, contact Guns N Hoses directly for a consultation.
Myth #4: Skylights Reduce Indoor Privacy
The idea that a skylight will impact your privacy is a little silly to begin with, since it presupposes that someone will climb onto your rooftop just to peek in at you. But even if that were to happen, skylights can be designed and placed in ways that minimize visibility of the interior from the outside.
Design options that can help you maintain privacy with a skylight include:
- Frosted glass
- Tinted glass
- Blinds
Additionally, skylights can be placed on upper stories of the home, which makes accessing them from the outside too difficult to be practical. All things considered, there’s no reason to worry about your privacy if you plan your skylight installation thoughtfully.

Myth #5: Skylights Are Expensive
While skylights can be a more expensive addition to a home compared to traditional windows, they often add value to the property. Some estimates put the value increase of installing a skylight at 2-5% of the home’s total value.
Skylights can also provide cost savings in the long run through improved natural light, which reduces your need for electric lighting and can lower your utility bills. On average, skylights can provide cost savings of $20-$40 per year in reduced energy costs.
Myth #6: Skylights Are Noisy
With proper insulation, skylights can be just as quiet as traditional windows. Modern skylights come equipped with noise-reducing features, such as double-paned glass and insulation, which can reduce noise levels by up to 50%.
Myth #7: Skylights Aren’t Secure
Breaking into a home through a skylight is no easier than breaking in through a window—in fact, it’s likely to be much harder. In addition to being placed in areas that are generally far less accessible from the ground, skylights can be designed and installed with the same safety features as windows, such as locking mechanisms and shatter-resistant glass.
When you contact Guns N Hoses about installing a skylight in your home, we’ll provide you with a list of safety options. We’ll also make recommendations based on the skylight’s location, your home’s design, and your needs as a homeowner.

Myth #8: Skylights Make Your Furniture Fade
Most modern skylights come with UV-blocking glass to protect interior furnishings from fading. This type of glass blocks up to 99% of harmful UV rays, which can cause fading and deterioration of interior furnishings. The use of this type of glass can significantly reduce the risk of fading and help protect the investment made in interior furnishings.
Myth #9: Skylights Are Difficult to Clean
With the advent of self-cleaning glass and tilt-in skylights, cleaning has become considerably easier and more convenient. Self-cleaning glass has a special coating that helps break down and wash away dirt, while tilt-in skylights are designed so that they can be adjusted and easily cleaned from the interior of the home. We’re happy to tell you all about the best options for keeping your skylight clean when you call us about service for your existing skylight or installing a new one.
Myth #10: Skylights Don’t Provide Enough Light
The myth that skylights don't provide enough light is simply not true. Skylights come in a variety of sizes and designs, making it possible to bring in ample natural light to a room. In fact, a well-placed skylight can provide up to three times more light than a traditional window of the same size.
Additionally, skylights can be used to strategically bring light into areas of the home that are typically darker, such as hallways, closets, and bathrooms. Using reflective surfaces and light-directing materials can further maximize the amount of natural light skylights provide.
How to Install a Safe, Efficient, & Convenient Skylight
Most of the concerns Calgarians have about skylights are pretty baseless—and at best, they’re the same problems you’d experience with any traditional window. That being the case, there’s absolutely no reason not to have a skylight installed in your home if you want one.
To learn more about installing a secure and cost-effective skylight in your home, contact Guns N Hoses. We’ll be happy to walk you through your options and provide an accurate quote for the project!
We all want to improve the energy efficiency of our homes. Energy-conscious living is better for the environment and helps battle the ever-rising costs of gas and electricity.
ENERGY STAR appliances and electronics lower consumption inside your home. But your home’s exterior plays a massive part in improving energy efficiency, too.
When you think about it, your roof, exterior walls, doors, and windows are the gateways for energy to flow in and out of your home. The materials used and the condition of these structures can affect the performance and the overall energy efficiency of your personal ecosystem.
Here are 7 ways your home’s exterior can improve energy efficiency and lower utility bills.
1. Roofing Materials Matter
Roof Colour Can Change More Than the Look
If you wear a black shirt on a hot day, you’ll feel warmer than someone wearing a white top. The same principle applies to roofing materials exposed to the sun. Dark roofing materials will absorb and hold more heat than light-coloured roofing materials.
So the question is, are you (and your home) usually trying to stay cool or warm? Cold climates that often require heating are better served by dark roofs that absorb more heat through the winter. This raises the temperature inside your structure and lessens the workload for your heating system.
Alternatively, homes in warmer climates are better served by light-coloured roofs. Light exteriors will better reflect heat through the hot months and improve the efficiency of your air conditioner. This is why many buildings in the Mediterranean and other hot climates are painted entirely white.
Roofing material type will also affect how much heat is reflected or maintained. Still, the colour of your roof can make a difference in regulating your home’s temperature.
Weather-Resistant Roofing Works Better
Wind can be a problem for poorly installed roofs or roof materials that aren’t rated for your climate. High-velocity winds have the power to lift and even remove shingles and other roofing materials. A damaged roof does a poor job of keeping climate-controlled air inside and the elements out of your house.
Hail damage is another common way that shingles are damaged. Roof damage can affect the performance of insulation, air conditioners, and furnaces. So make sure you consult a professional and choose the right type of roof next time you’re up for a replacement.
A rubber roofing product like Euroshield is ideal for regions that experience hailstorms and other extreme conditions. By reducing the replacement materials needed for damaged roofing, you also decrease the energy consumption used in manufacturing.
Harvest Your Own Energy with Solar Roofing
If you want to really improve your home’s energy efficiency and energy independence, install a solar roof. Outfitting your home with solar panels is expensive and requires the work of a specialized roofing contractor and an electrician.
Using harvested solar energy to power your home’s heating and electrical systems will definitely lower your utility bills. But because of the high costs of entry, solar roofing isn’t for everyone. Ask your local roofing company what products are available in your region and the ballpark costs for installation.
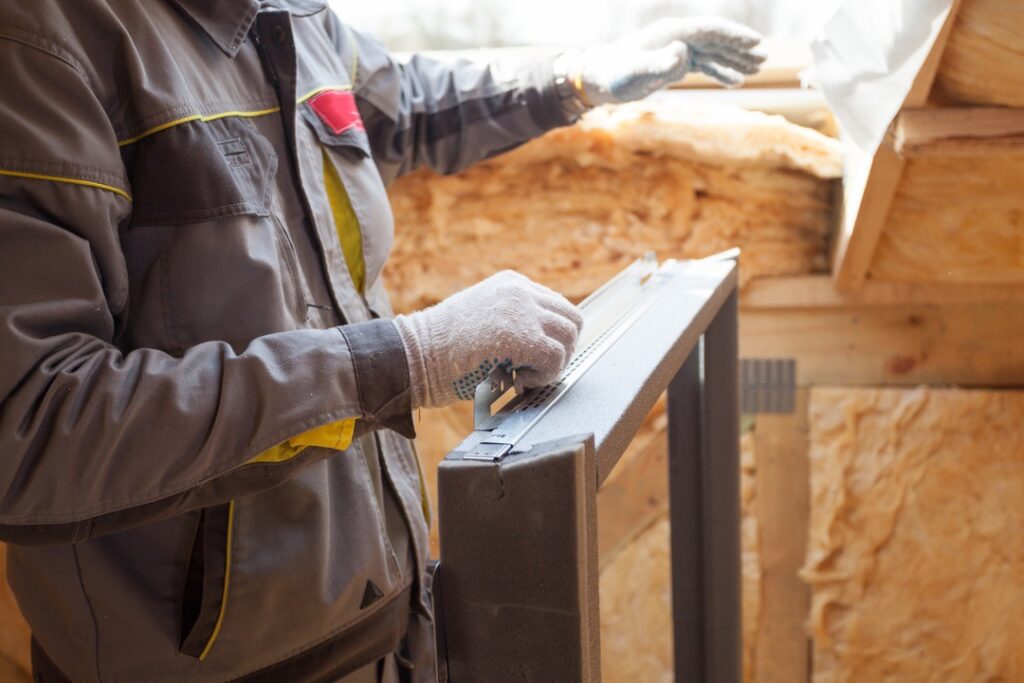
2. Excellent Insulation Helps Your Home Stay Efficient
Home insulation is any material placed in and around your home’s exterior surfaces to help regulate heat. Insulation should keep warm air inside during the winter and hot air outside during the summer.
Properly insulating all of the key areas in your home can improve energy efficiency for your heating and cooling systems. Ensure attics, exterior walls, and basement foundations are insulated with an R-value (ability to resist heat flow) suitable for your climate.
Infrared thermal imaging is one way to get a clear idea of where energy loss occurs in your attic and other areas. This technology lets you pinpoint trouble spots in your insulation and air seal or reinsulate these spaces for better energy efficiency.
Here are some more ways to make your attic energy efficient.
Control Your Climate with High-Efficiency HVAC
Once your home is adequately insulated and ready to keep the heat in, choose HVAC equipment that’s also energy efficient. Investing in a high-efficiency furnace can lower your monthly heating costs by up to 40%!
Look for certified ENERGY STAR air conditioners, furnaces, and other appliances to improve your home's energy efficiency.
3. Solar Roof Vents Will Help Lower Bills
A critical aspect of healthy indoor air quality is ventilation. Warm air condenses once it rises to your attic, adding unwanted moisture to your insulation and roofing materials. This high humidity can damage structural materials and lead to mould and bacterial growth.
The answer: solar attic vents! These solar-powered vents use the sun’s energy to open and close, controlling temperature and humidity. Exchanging and regulating air quality with roof vents lowers the demand on your HVAC system, particularly in the summer when stagnant hot air can fill your attic.
These roof additions power themselves, improve your home’s energy efficiency, and contribute to a longer lifespan for your roofing and insulation materials.

4. Make Sure Your Gutters Are Flowing Freely
The gutters and eavestroughs hanging off your roof are there to channel water runoff to safe locations. But when these drains get clogged or blocked, it can lead to major damage and run up your utility bills.
The water that drains from your roof can be used to irrigate lawns and gardens with natural, free rainwater. Using tap water and automated sprinklers to help your grass grow costs money and extra energy.
LeafGuard is a great way to keep muck and debris out of your gutters. This product protects eavestroughs from debris and helps keep water flowing where it should be. And remember that it’s common to replace gutters and downspouts several times throughout the life of a home.
Here are some tips for fixing a leaky gutter that isn’t delivering water where you need it.
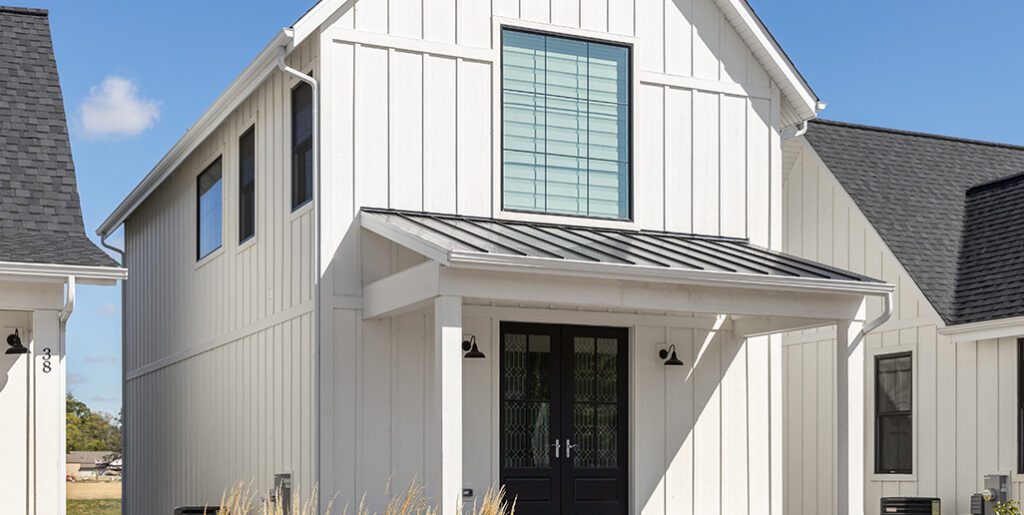
5. Keep Heat Inside with Quality Siding
The quality and condition of your siding are other factors that can help or hinder your home’s energy efficiency. No part of your home’s exterior is safe from weather damage, and siding is no exception.
Heat energy can escape through holes, cracks, and gaps in siding due to weather or aging. This is why, just like your roof, your siding should be inspected by a professional after a major hailstorm.
Siding can also improve your home’s energy efficiency just as roofing materials can—by its colour. Dark colours will absorb heat and make your home warmer; light colours reflect heat and help keep indoor temperatures down. Siding materials have their own insulation value, so work with an exterior specialist to pick a siding colour and material that helps keep your energy costs down.
Your impact on global energy efficiency can be improved when you select a recyclable siding product like Hardie boards and panels. This material is highly rated against hail and poor weather and uses recycled materials in its manufacturing.

6. Conserve Consumption with Energy-Efficient Windows & Doors
If there’s a draft in your house, there’s a good chance it's coming from a window or doorway. Poorly sealed or insulated doors and windows are one of the ways your home’s energy efficiency can take a hit.
Older, single-pane windows just don’t perform very well in cold climates. Doors and windows can account for 25% of your home’s total heat loss. So upgrading these areas should be a priority if you’re looking to improve your home’s energy efficiency.
Refitting your home with energy-efficient doors and windows is the most effective way to limit heat loss in these areas. But weatherstripping windows and doors or using heat-shrink film over glass panes are a couple of less expensive solutions to prevent serious heat loss. Here are some DIY tips for keeping the heat in.
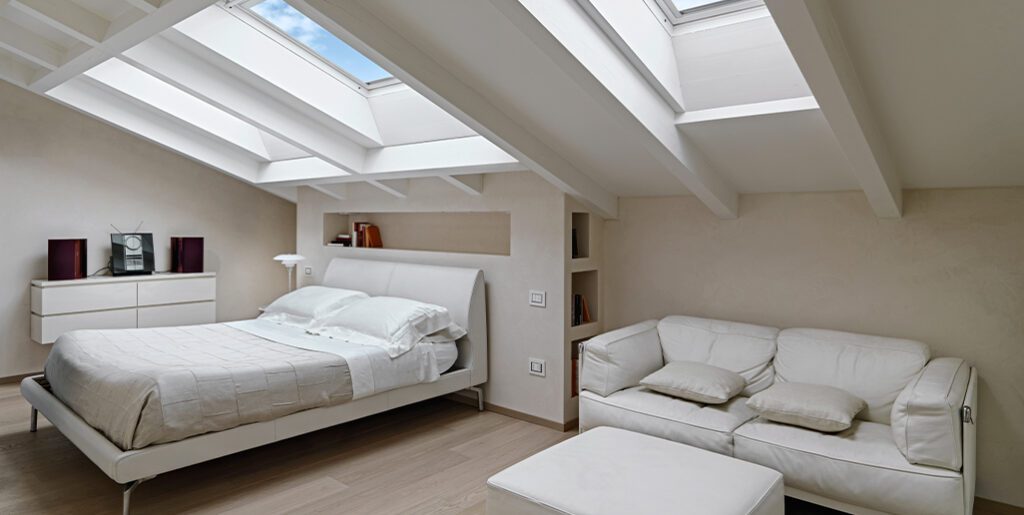
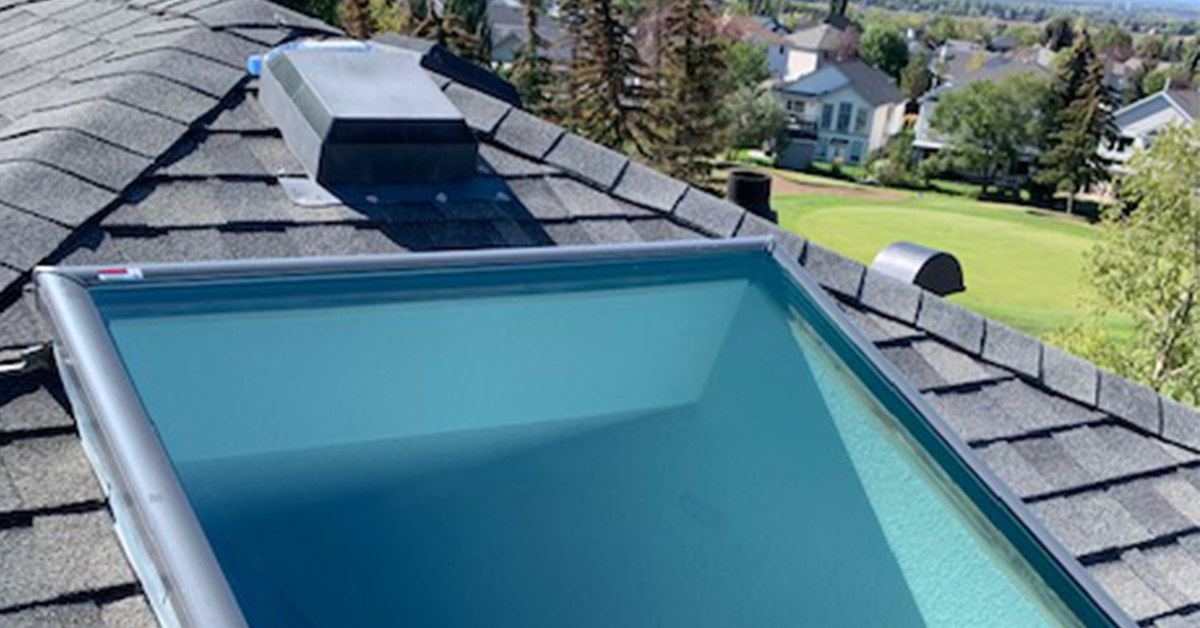
7. Install a Skylight for Added Natural Light & Heat
A skylight is a beautiful addition to any home, but it’s not just the aesthetic that will benefit your lifestyle. Skylights allow the sun to do work that your utility company would otherwise charge for.
Sun tunnels and skylights let precious natural sunlight into your home. And this sunlight provides warmth throughout the day, which means you can turn the thermostat down. If it’s summertime and you want to keep the heat out, reflective skylight windows and coatings are available.
Natural light is also an excellent excuse to flick the lights off during the day. Here’s some great info about maximizing sun exposure with a skylight, which is a great way to lower your home’s energy consumption.

Grants for Greener Homes in Alberta
You’re not the only one hoping to improve your home’s energy efficiency—the government wants to see it too! So much so, that provincial and federal governments have created rebates, grants, and bursaries for energy-conscious homeowners.
The Canada Greener Homes Initiative is designed for homeowners ready to retrofit their living space with energy-efficient upgrades. The program offers grants and interest-free loans to help with these renovations.
The Clean Energy Improvement Program (CEIP) is a provincial mandate in Alberta that helps homeowners complete energy-efficient upgrades without putting money down. The City of Calgary has more information on how this affects property owners.
We’re Committed to Increasing Efficiency
Guns N Hoses Roofing is committed to improving energy efficiency in communities across Calgary. We are proud of our partnerships with energy-conscious suppliers and encourage homeowners to consider eco-friendly exterior products such as Euroshield and Hardie Board.
Our experts will always inform you of the available grants and rebates once you’re ready to complete exterior upgrades and additions.
We take on every job with the goal of improving your home’s energy efficiency when we repair or replace roofs and exteriors. Give us a call if you’re ready to update your home’s exterior and lower your energy consumption.
Roof flashing is vital for maintaining the quality and reliability of your roof. If you haven’t heard of roof flashing before, don’t panic—we’ll go over what it is, how it works, and when yours might need to be replaced. At Guns n Hoses, we don’t only provide roof replacements and repairs, we’re also happy to share our expertise to help you learn about your home’s exterior and insulation needs.
See Also: Roofing Repair Services
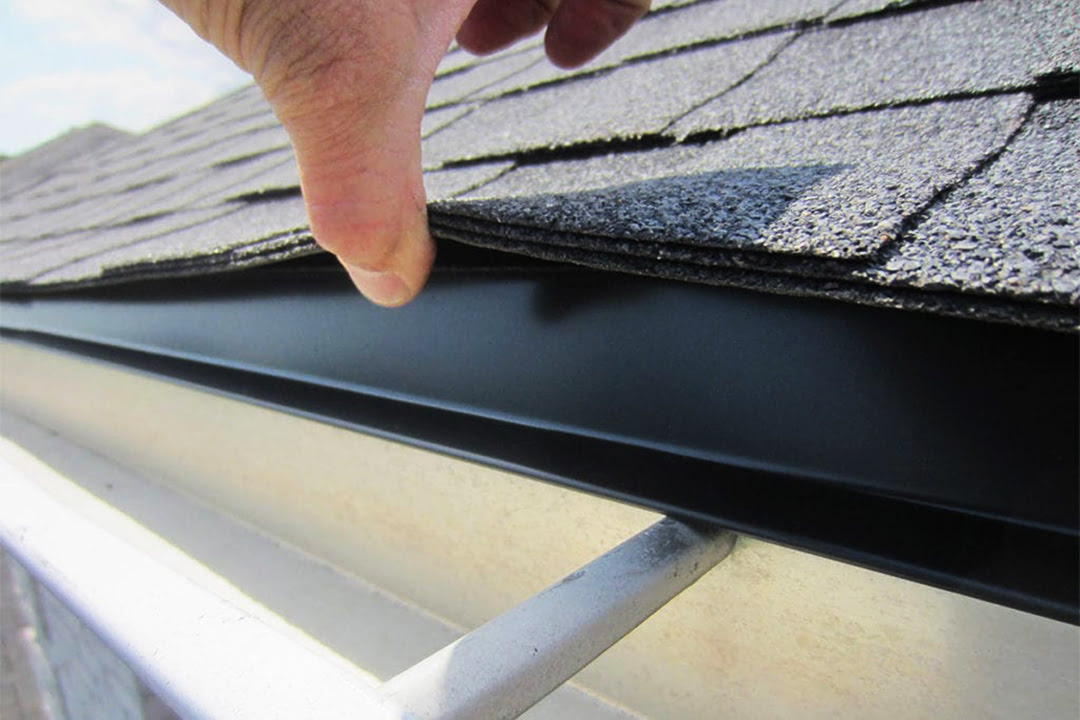
What Is Roof Flashing?
Have you ever noticed the metal sheets on your roof, chimney, or pipes? These sheets make up the roof flashing of your home and are there to protect your home from water damage and leaks.
How Does It Work?
The way flashing works has to do with the placement of the metal sheets. Depending on the location of the flashing, it may be placed differently. Flashing is placed purposely in different ways to direct pooling water away from the parts of your roof that are most susceptible to damage from moisture, like the joints or seams.
The Role Roof Flashing Plays in Your Home’s Envelope
Your home’s building envelope (also called the shell) separates the inside of your home from the outside. It includes the roof, walls, windows, doors, and foundations. The envelope protects your home from the outdoor elements and helps maintain temperature control.
Flashing plays an important role in your home’s envelope by keeping outdoor elements like water from getting into your roof and walls. It protects the underlay that sits under the shingles and the first layer of roofing, which is called the deck.
Roof Flashing Installation
Typically, roof flashing is placed before shingles are laid down. If shingles are already laid down, they will have to be removed to properly replace any damaged flashing.
Flashing is installed by starting at the corners located on your roof and working inward. Different methods are used to place the flashing around the roof.
Different Roof Flashing Types & Techniques
Although galvanized steel is the most commonly used metal for flashing, other metals may be used such as aluminum and copper. There are also different methods to roof flashing that depend on where the flashing is being placed. Let’s go over the most common types of flashing and where each would be installed on your roof.
Step Flashing
Step flashing is used against the sides of any walls or chimneys the roof bumps into. In step flashing, the metal is bent at a 90 degree angle and placed underneath the shingle, against the wall it is being applied to. This process is repeated going upward to create a slope and prevent any openings for water to creep into.
Continuous Flashing
Continuous flashing, also known as apron flashing, is a long piece of metal that is cut to direct water down to the shingles from the base of a wall, window, or dormer. Although continuous flashing is sometimes used on walls and chimneys that bump into the roof, it is most commonly used around windows and dormers.
Counter Flashing
Counter flashing is sometimes confused with step flashing, since it has the appearance of steps. However, unlike step flashing, counter flashing is performed by cutting into walls made of stone or masonry that connect to the roof. This is done by sawing into the mortar joint.
Roof Flashing Replacement
Some signs of worn out flashing are obvious, but others are less apparent. For example, if you have step flashing, it won’t be visible since it’s underneath the shingles on your roof—so how do you know when it’s time to repair or replace it? Let’s go over some indicators that your flashing needs professional attention.
Visible Blemishes on Exposed Flashing
Weather elements like hail, heavy snow, or harsh winds can damage your flashing. A common sign that your flashing needs to be repaired is if you notice any rusting of the metal.
Additionally, any holes, dents, or cracks are a sure sign that it’s time to repair flashing. Failing to repair these issues can introduce water into your roof and into your home, causing water damage.
You should also inspect your flashing if you notice any interior leaks near windows, skylights, or fireplaces. These can all be signs that your flashing needs repairs.
Age of Roof Flashing
Roof flashing typically lasts between 10 and 20 years, but this will vary depending on the impacts from weather. In areas like Calgary, we often experience heavy snow in the winter and this can take a toll on your flashing. Replacing your flashing before it gets damaged will save you costly repairs from water damage.
Other Factors to Consider
If you are thinking of replacing your roof, but are unsure of whether your flashing needs replacing as well, we suggest you get a professional opinion. We also recommend that you check your roof annually to stay on top of any maintenance and avoid costly repairs resulting from water damage.
Don’t Cut Corners—Choose the Experts
Roof flashing plays an essential role in keeping water from entering into your home by directing water away from pooling areas. With such harsh winters in Calgary, it’s important to stay on top of the maintenance of your roof. The professionals at Guns n Hoses have extensive experience for all your roofing, exterior, and insulation needs. Contact our experts to get a quote!
Roof Flashing FAQs
How Much Does It Cost to Install Flashing?
The cost to install flashing will vary from home to home, and depend on the size of the roof. Some homes may need more flashing placed if they have numerous walls or chimneys butting up against the roof. Flashing repairs can range from $150 to $3000 depending on how minor or major the replacement is.
What Are the Signs that Flashing was Improperly Installed?
Reused flashing materials can be a dead giveaway that your flashing was installed incorrectly. Poor roofing companies often reuse flashing when doing roof repairs to save them time and cut corners.
Sometimes, low-quality roofing companies will also use shingles as flashing material and attach these shingles in places where metal flashing should be. These issues cost the homeowner more time and money since they make leaks all but inevitable.
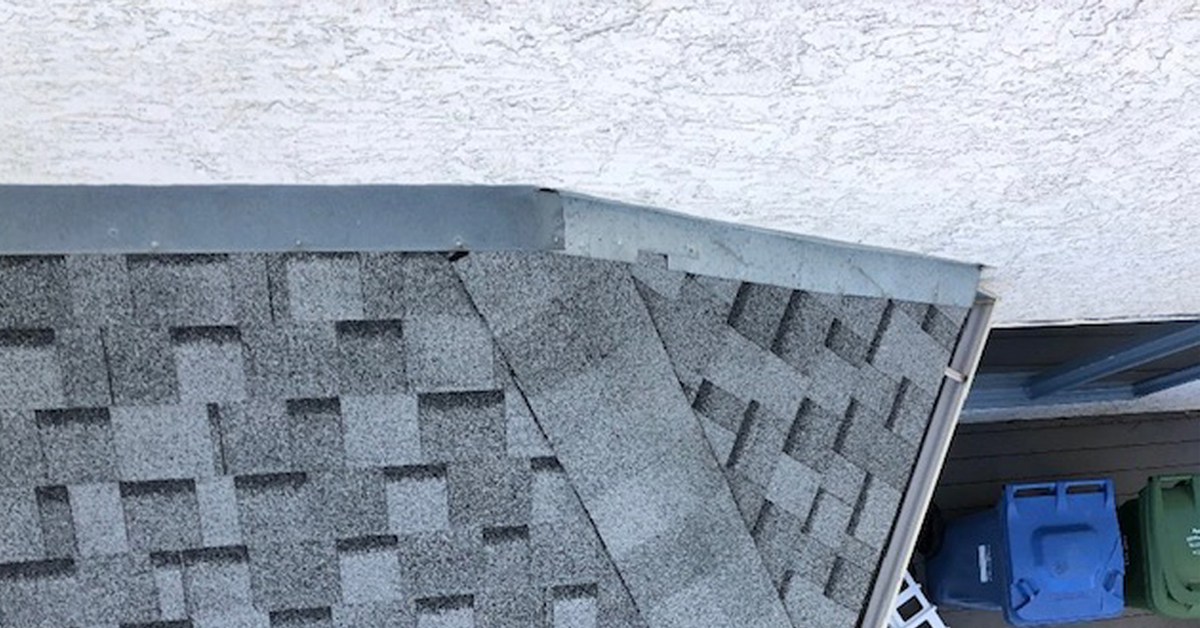
What Do I Do If Water Gets Between My Fascia and Eavestrough?
Check your drip edge. The drip edge is part of the roof flashing that acts as a barrier to cover the gaps between the shingles and the eavestroughs. The drip edge allows the water to run directly into the water, rather than between the fascia and eavestroughs.
If the drip edge is in good condition and water is still dripping between your fascia and eavestroughs, this could mean that your eavestroughs are loose. Sometimes tightening the brackets holding the eavestroughs in place is an easy fix.
If water is still leaking after tightening the brackets, you may need to replace the eavestroughs altogether. Contact us if you have any questions about your roof or your house’s exterior.


